Follow Me On Social Media!

Homemade Mongolian Beef (Sticky, Crispy, 30 Minutes)
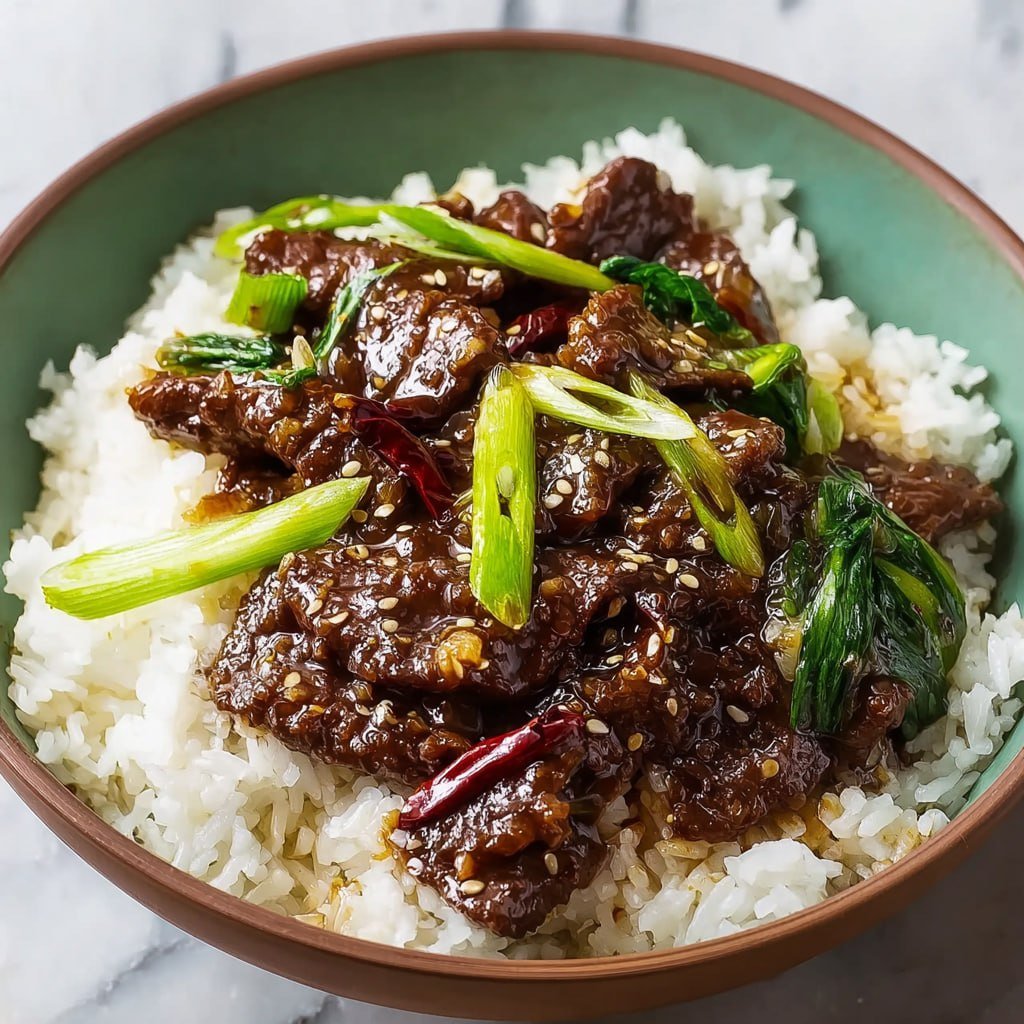
This homemade Mongolian beef is crispy-edged flank steak tossed in a glossy, sweet-savory sauce. Ready in 30 minutes and better than any takeout you've had.

After years of chasing that perfect takeout-style dinner in my own kitchen, I can honestly say this homemade Mongolian beef has become one of the most-requested meals in my house. Thin ribbons of flank steak get seared until the edges crackle, then everything gets tossed in a glossy, gingery sauce that clings to every single piece. It’s the kind of dinner that makes everyone wander into the kitchen asking, “What is that smell?”
Fun fact: despite the name, Mongolian beef isn’t actually from Mongolia. The dish was invented in Taiwan in the 1950s at Mongolian barbecue restaurants, where the exotic-sounding name was chosen purely for marketing appeal.
Why this recipe works
- A generous cornstarch coating creates those signature crispy, almost-caramelized edges on every slice of beef.
- The sauce hits every note at once — deep umami from soy and oyster sauce, sweetness from dark brown sugar, and a bright little pop of rice vinegar to keep it from feeling heavy.
- Cooking the beef in small batches over ripping-hot oil is the difference between restaurant-quality crispy beef and the sad, steamed version you get when you crowd the pan.
- Fresh garlic and ginger (a lot of both) build flavor you simply can’t fake with powders or bottled sauces.
Ingredients
- 1.5 lbs flank steak, sliced very thin against the grain
- 1/3 cup cornstarch
- 1/2 teaspoon salt
- 1/4 teaspoon white pepper
- 1/3 cup high-smoke-point oil (avocado, vegetable, or canola)
- 2 tablespoons sesame oil
- 8 garlic cloves, minced
- 1.5 tablespoons fresh ginger, grated
- 2/3 cup low-sodium soy sauce
- 1/2 cup water
- 1/3 cup dark brown sugar
- 2 tablespoons oyster sauce
- 1 teaspoon rice vinegar
- 1 teaspoon cornstarch mixed with 2 tablespoons water (slurry)
- 1 teaspoon chili flakes (optional)
- 5–6 green onions, cut into 2-inch batons
- Sesame seeds, for finishing
Instructions
Step 1: Prep the beef
Pop the flank steak into the freezer for about 15 minutes — this firms it up just enough to slice cleanly. Once it’s chilled, cut it into thin strips (1/8 to 1/4 inch), always slicing against the grain so the finished beef is tender rather than chewy.
Step 2: Dry and coat
Blot every piece of beef with paper towels until it’s genuinely dry — I mean it, this step decides whether your beef will crisp up or steam. Toss the slices with the cornstarch, salt, and white pepper until every piece is dusted, then let it rest for 10 minutes while you build the sauce.
Step 3: Build the sauce
Warm the sesame oil in a small saucepan over medium heat, then stir in the garlic and ginger. Let them sizzle for a minute or two until they turn golden and your kitchen starts smelling incredible. Pour in the soy sauce, water, brown sugar, oyster sauce, and rice vinegar, and bring the whole thing to a gentle simmer.
Step 4: Thicken it up
Whisk the cornstarch slurry into the simmering sauce and keep stirring for 3 to 4 minutes, until the sauce turns glossy and coats the back of a spoon. Pull it off the heat and set it aside — it’ll thicken a bit more as it sits.
Step 5: Sear the beef
Get your wok as hot as it will go — the oil should shimmer and be right on the edge of smoking. Add the beef in a single layer without crowding (this usually takes 2 or 3 batches), searing each side for 1 to 2 minutes until golden and crispy. Transfer each batch to a plate as you go.
Step 6: Toss and serve
Pour off all but about a tablespoon of oil, then return every piece of beef to the wok. Pour the sauce over the top, scatter in the green onions, and toss aggressively over high heat for about 60 seconds until everything is sizzling and glazed. Spoon it straight over hot steamed rice and finish with a shower of sesame seeds.
Nutrition information
- Calories: 465 per serving
- Protein: 38g
- Carbohydrates: 28g
- Fat: 22g
- Sugar: 18g
- Sodium: 1,340mg
- Fiber: 1g
Pro tips for the best Mongolian beef
- Skip the non-stick pan. This recipe demands screaming-hot metal, and non-stick coatings simply cannot handle the temperature you need for a proper sear.
- Reach for white pepper instead of black — it brings a warmer, more layered heat that plays beautifully against the sweet sauce.
- Want to sneak in more veg? After frying the beef, toss sliced bell peppers, broccoli florets, snow peas, or mushrooms into the remaining oil for 2 to 3 minutes before returning the beef and sauce to the wok.
- Prep ahead where you can. The sauce keeps beautifully in the fridge for up to 3 days, and the coated beef can be sliced and stored (covered) a day in advance — then you’re 15 minutes from dinner.
Frequently asked questions
How hot should my wok actually be?
As hot as your stove can possibly get it. Chinese cooks call this “wok hei,” and it’s the secret to that smoky, seared edge you love in takeout. A ripping-hot surface also stops the beef from sticking, which is a lovely bonus.
What can I use in place of oyster sauce?
Two tablespoons of hoisin sauce mixed with a teaspoon of fish sauce makes a great swap. If neither is in your pantry, an extra tablespoon of soy sauce combined with a teaspoon of sugar will get you close.
How do I make sure I’m slicing against the grain?
Look closely at the flank steak and you’ll see the muscle fibers running in one clear direction — that’s the grain. Slice your knife perpendicular to those lines. Cutting this way shortens the fibers and makes the beef dramatically more tender.
Why did my sauce turn out too thin?
Give it more time on the heat before adding the beef, or whisk in a bit more slurry (start with 1/2 teaspoon cornstarch mixed with a tablespoon of water) until it reaches the glossy, spoon-coating stage.
Can I skip the deep frying?
Absolutely. Coat the beef in cornstarch, brush it lightly with oil, and air fry at 400°F for 8 to 10 minutes, shaking the basket halfway through. You can also sear it in batches in a very hot dry skillet. It’s a touch less crispy than the wok version, but still deeply delicious.