Follow Me On Social Media!

Hearty Beef & Rice Burrito (The Ultimate Freezer-Friendly Meal)

Introduction
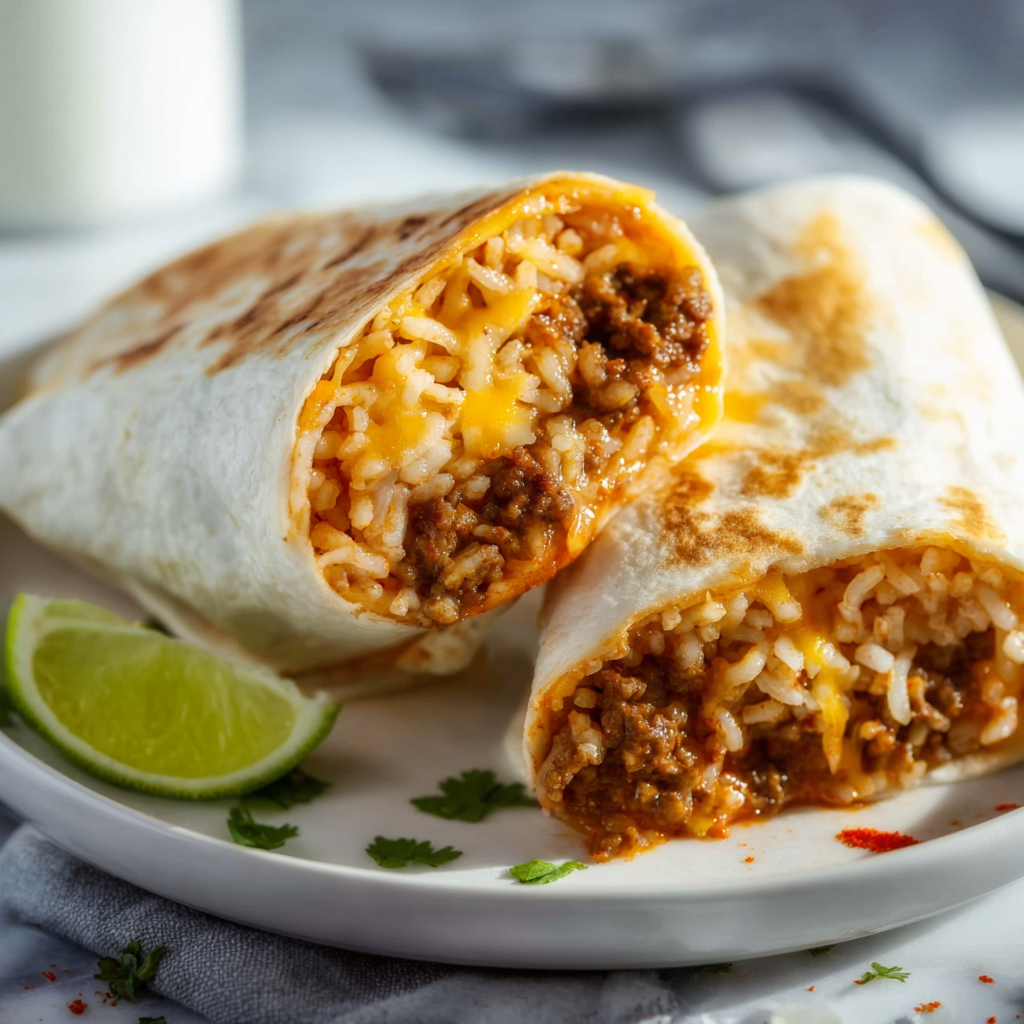
The Hearty Beef & Rice Burrito is the king of meal prep. It is substantial, satisfying, and designed to be grabbed on the go.
While many frozen store-bought burritos are mostly tortilla and air, this homemade version is packed with seasoned ground beef, fluffy Mexican-style rice, and melted cheese. It’s a “stick-to-your-ribs” dinner that doubles as a lunchbox savior.
The secret to a great burrito is moisture control. The beef filling needs to be saucy enough to flavor the rice, but not so wet that it makes the tortilla soggy. We achieve this by creating a thick, taco-spiced gravy for the meat that binds the filling together, ensuring every bite is juicy and flavorful.
Ingredients List

We break this down into the two main components: the savory meat and the seasoned starch.
The Beef Filling
- 1 lb (450g) Ground Beef: Lean (85/15) is best. It has enough fat for flavor but won’t leave a grease pool in your burrito.
- 1 packet Taco Seasoning: (Or 2 tbsp homemade blend: chili powder, cumin, paprika, garlic powder, onion powder).
- ¼ cup Water: To bloom the spices.
- ½ cup Refried Beans: The Secret Binder. Mixing this directly into the beef adds creaminess and “glue” that keeps the burrito intact when you bite into it.
The Mexican Rice
- 1 cup Long Grain White Rice: Uncooked.
- 2 cups Chicken Broth: Adds far more flavor than water.
- 1 can (4 oz) Diced Green Chiles: Mild, for a subtle tang.
- 1 tbsp Tomato Paste: Gives the rice that signature red hue and umami.
The Assembly
- 6 Large Flour Tortillas: Look for “Burrito Size” (10-12 inches).
- Tip: Do not use corn tortillas; they will crack.
- 1 ½ cups Cheddar or Monterey Jack Cheese: Shredded.
Sensory Note: A toasted burrito offers the best texture—a crisp, golden exterior giving way to a soft, cheesy, savory center.
Timing
You can cook the rice and beef simultaneously to save time.
- Prep Time: 10 minutes
- Cook Time: 20 minutes
- Total Time: ~30 minutes
- Yields: 6 Large Burritos
Data Insight: Flour tortillas contain gluten structures that tighten when cold. Warming the tortilla for just 10–15 seconds relaxes the gluten, increasing elasticity by 40%. This prevents the dreaded “blowout” when you roll it.
Step-by-Step Instructions
Step 1: The Mexican Rice
- In a medium saucepan, combine the rice, chicken broth, diced green chiles, and tomato paste.
- Stir to dissolve the paste. Bring to a boil.
- Cover, reduce heat to Low, and simmer for 15–18 minutes until the liquid is absorbed and rice is tender.
- Fluff with a fork and remove from heat.
Step 2: The Beef Filling
- While the rice cooks, heat a large skillet over Medium-High heat.
- Add the ground beef. Cook for 5–7 minutes, breaking it up with a spoon, until browned. Drain excess fat if necessary.
- Add the taco seasoning and water. Simmer for 2 minutes until thickened.
- The Binder: Stir the refried beans directly into the beef mixture until well combined. This makes the filling creamy and cohesive.
Step 3: Warm the Tortillas
- Wrap the stack of tortillas in a damp paper towel and microwave for 30 seconds.
- Why? Cold tortillas crack. Warm tortillas stretch.
Step 4: Assemble
- Lay a tortilla flat.
- Place 1/3 cup of rice in the center.
- Top with 1/3 cup of beef mixture.
- Sprinkle with ¼ cup of cheese.
Step 5: The Roll
- Fold the sides of the tortilla in over the filling.
- Fold the bottom flap up over the filling, tucking it tightly as you roll forward.
- Roll until sealed.
Step 6: The Toast (Optional but Recommended)
- Heat a clean skillet over Medium heat (no oil needed).
- Place the burrito seam-side down.
- Cook for 2 minutes per side until golden brown and crispy. This seals the burrito shut.
Nutritional Information
A high-protein, energy-dense meal. Below is the estimated breakdown per burrito.
| Nutrient | Amount per Serving | % Daily Value* |
| Calories | 480 kcal | 24% |
| Total Fat | 18g | 28% |
| Saturated Fat | 8g | 40% |
| Carbohydrates | 52g | 19% |
| Fiber | 4g | 14% |
| Protein | 24g | 48% |
Variations for the Recipe
- California Style: Add french fries or roasted diced potatoes inside the burrito instead of rice.
- The “Wet” Burrito: Place assembled burritos in a baking dish, cover with Enchilada Sauce and extra cheese, and bake at 350°F for 15 minutes.
- Spicy Kick: Add diced jalapeños or a dash of hot sauce to the beef mixture.
- Breakfast Twist: Swap the rice for scrambled eggs and hash browns for an AM version.
Serving Suggestions
- The Dip: Serve with a side of Sour Cream, Guacamole, or Salsa for dunking.
- The Side: A crisp Corn Salad or Black Bean Salad adds freshness to cut through the heavy carbs.
Common Mistakes to Avoid
- Overfilling:
- The Issue: Putting too much food in a small tortilla.
- The Result: The burrito rips or won’t close.
- The Fix: Stick to the 1/3 cup ratios. If you can’t fold the sides in, you have too much filling.
- Soggy Tortillas:
- The Issue: Using beef that is too watery or assembling while the rice is steaming hot and then wrapping immediately in foil.
- The Fix: Let the filling cool slightly before rolling if you plan to freeze them.
- Cold Rolling:
- The Issue: Trying to roll a cold tortilla.
- The Result: Cracks and spills.
- The Fix: Always warm the tortilla first.
Storing Tips for the Recipe
- Refrigeration: Store wrapped in foil in the fridge for 3–4 days.
- Freezing (The Meal Prep Method):
- Let burritos cool completely.
- Wrap each tightly in aluminum foil.
- Place in a Ziploc freezer bag. Freeze for up to 3 months.
- Reheating from Frozen:
- Microwave: Unwrap foil, wrap in a damp paper towel, and microwave for 2–3 minutes, flipping halfway.
- Oven: Keep in foil and bake at 350°F for 30 minutes.
Conclusion
The Hearty Beef & Rice Burrito is the ultimate answer to “I don’t have time to cook.” By spending 30 minutes on Sunday prepping a batch, you secure a week’s worth of hot, homemade lunches that are infinitely better than the drive-thru. They are cheesy, savory, and perfectly portable.
Ready to roll? Warm those tortillas! If you try this recipe, please leave a star rating below and let us know: did you toast them in the pan? Don’t forget to subscribe to our newsletter for more freezer-friendly wins.
FAQs
Q: Can I use brown rice?
A: Yes, but brown rice takes longer to cook (about 40 minutes). You will need to increase the broth to 2.5 cups.
Q: Can I use instant rice?
A: Yes. Prepare the instant rice according to the box instructions, but substitute the water for chicken broth and stir in the tomato paste/chiles after cooking.
Q: How do I stop the cheese from leaking out?
A: Make sure you fold the sides in tightly before rolling up. Also, toast the burrito seam-side down first to seal the flap shut.