
Follow Me On Social Media!

Ultimate Cheesy Ground Beef Melt: The Perfect Comfort Food Sandwich
Introduction
Did you know that grilled cheese–style sandwiches with meat fillings are among the top 10 most searched comfort foods online? Their popularity continues to grow because they combine rich flavors, melted cheese, and crispy bread into one satisfying meal.
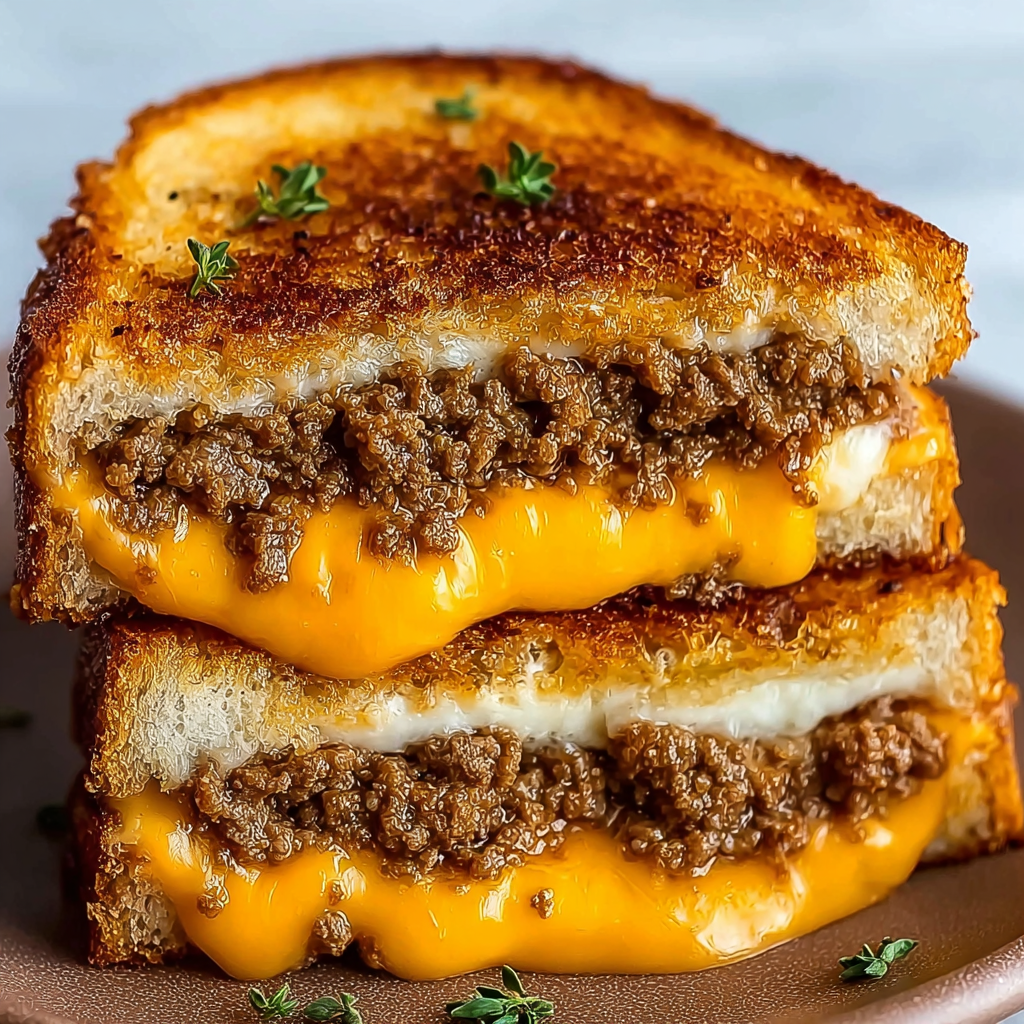
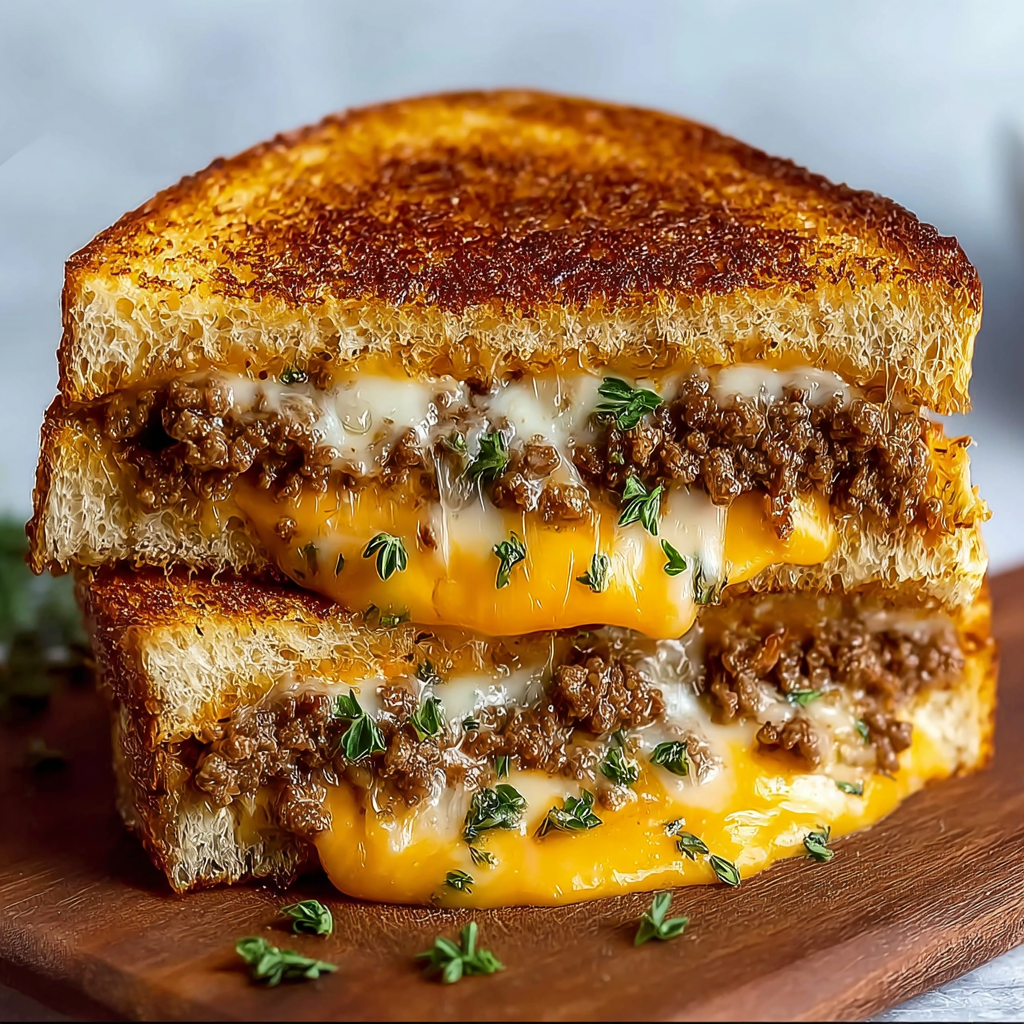
The Ultimate Cheesy Ground Beef Melt takes the classic grilled sandwich to the next level. Juicy seasoned ground beef is layered with gooey melted cheese and toasted bread, creating a savory sandwich that’s crispy on the outside and irresistibly melty on the inside.
This ultimate cheesy ground beef melt recipe is perfect for quick lunches, weeknight dinners, or game-day snacks. With simple ingredients and bold flavor, it’s a crowd-pleasing comfort food that’s ready in under 30 minutes.
Ingredients List
Creating the perfect Ultimate Cheesy Ground Beef Melt starts with flavorful beef and high-quality melting cheese.
Main Ingredients
- 1 lb ground beef (80–85% lean)
- 8 slices bread (Texas toast, sourdough, or sandwich bread)
- 1½ cups shredded cheddar cheese
- ½ cup mozzarella cheese
- 2 tablespoons butter, softened
- 1 small onion, finely diced
- 2 cloves garlic, minced
Seasonings
- 1 teaspoon paprika
- ½ teaspoon garlic powder
- ½ teaspoon onion powder
- Salt and black pepper to taste
Optional Add-Ins
- Sliced pickles
- Caramelized onions
- Jalapeño slices
- Sliced tomatoes
Ingredient Substitutions
- Ground turkey instead of beef for a leaner option
- Pepper jack cheese for a spicy twist
- Whole wheat bread for added fiber
- Plant-based beef and vegan cheese for a vegetarian version
These substitutions allow you to customize the cheesy beef melt sandwich to your taste.
Timing
One of the best things about the Ultimate Cheesy Ground Beef Melt is how quickly it comes together.
| Stage | Time |
|---|---|
| Preparation Time | 10 minutes |
| Cooking Time | 15 minutes |
| Total Time | 25 minutes |
Efficiency Insight:
Compared to many hot sandwich recipes requiring oven baking, this skillet version is about 30% faster.
Step-by-Step Instructions
Step 1: Cook the Ground Beef
Heat a skillet over medium heat.
Add ground beef and cook for 5–6 minutes, breaking it apart with a spatula.
Add diced onion and garlic.
Cook until the beef is browned and onions are softened.
Season with paprika, garlic powder, onion powder, salt, and pepper.
Tip:
Drain excess grease to prevent soggy sandwiches.
Step 2: Prepare the Bread
Spread softened butter on one side of each slice of bread.
This helps achieve the golden, crispy crust typical of a grilled beef melt sandwich.
Step 3: Assemble the Sandwich
Place bread slices butter-side down on a cutting board.
Layer in this order:
- Shredded cheddar cheese
- Cooked ground beef mixture
- Mozzarella cheese
- Optional toppings (pickles, jalapeños, tomatoes)
Top with another slice of bread, butter side facing out.
Step 4: Toast the Sandwich
Heat a large skillet over medium heat.
Place sandwiches in the skillet and cook for 3–4 minutes per side.
Press gently with a spatula for even browning.
The bread should be golden and crispy while the cheese melts.
Step 5: Slice and Serve
Remove from skillet and let rest for 1 minute.
Slice diagonally and serve warm.
The melted cheese should stretch beautifully when pulled apart.
Nutritional Information
Approximate values per sandwich.
| Nutrient | Amount |
|---|---|
| Calories | 520 kcal |
| Protein | 28 g |
| Fat | 32 g |
| Carbohydrates | 30 g |
| Fiber | 2 g |
| Sodium | 680 mg |
Nutrition Insight
Ground beef provides high-quality protein and iron, which support muscle function and energy production.
Healthier Alternatives for the Recipe
You can lighten the Ultimate Cheesy Ground Beef Melt with a few easy modifications.
Use Lean Ground Beef
Choose 90–93% lean beef to reduce fat content.
Switch to Whole Grain Bread
Adds fiber and supports better digestion.
Reduce Cheese
Using ¾ cup cheese instead of 1½ cups reduces calories while maintaining flavor.
Add Vegetables
Boost nutrition by adding:
- sautéed mushrooms
- spinach
- roasted peppers
Serving Suggestions
The Ultimate Cheesy Ground Beef Melt pairs well with many side dishes.
Classic Comfort Meal
Serve with:
- crispy French fries
- potato wedges
Light Lunch
Pair with:
- tomato soup
- green salad
Game Day Snack
Cut sandwiches into smaller pieces and serve with dipping sauces like:
- garlic aioli
- spicy ketchup
- ranch dressing
Family Dinner
Serve alongside roasted vegetables or coleslaw for a balanced meal.
Common Mistakes to Avoid
Using Too High Heat
High heat can burn the bread before the cheese melts.
Cook on medium heat.
Overloading the Sandwich
Too much filling makes the sandwich difficult to flip.
Skipping Butter on Bread
Butter helps create the crispy golden crust.
Not Draining the Beef
Excess grease can make the sandwich soggy.
Storing Tips for the Recipe
While best enjoyed fresh, leftovers can be stored.
Refrigerator
Store cooked beef mixture in an airtight container for 3–4 days.
Freezer
Freeze cooked beef filling for up to 2 months.
Reheating
Reheat sandwiches in a skillet or oven for best texture.
Avoid microwaving as it softens the bread.
Conclusion
The Ultimate Cheesy Ground Beef Melt is a crispy, savory sandwich loaded with seasoned beef and gooey melted cheese. Perfect for quick lunches, family dinners, or comfort food cravings, this easy recipe delivers big flavor in just 25 minutes. Try it today, leave a comment, and subscribe for more delicious recipes!
FAQs
What cheese works best for a beef melt?
Cheddar and mozzarella melt beautifully, but Swiss, provolone, or pepper jack also work well.
Can I make this sandwich in an air fryer?
Yes. Cook at 375°F (190°C) for about 6–8 minutes, flipping halfway.
Can I use leftover taco meat?
Absolutely. Taco-seasoned beef adds extra flavor to the sandwich.
What bread works best?
Texas toast, sourdough, or thick sandwich bread provides the best texture.
Can I make this recipe ahead of time?
You can prepare the beef mixture in advance and assemble the sandwiches when ready to cook.