Follow Me On Social Media!

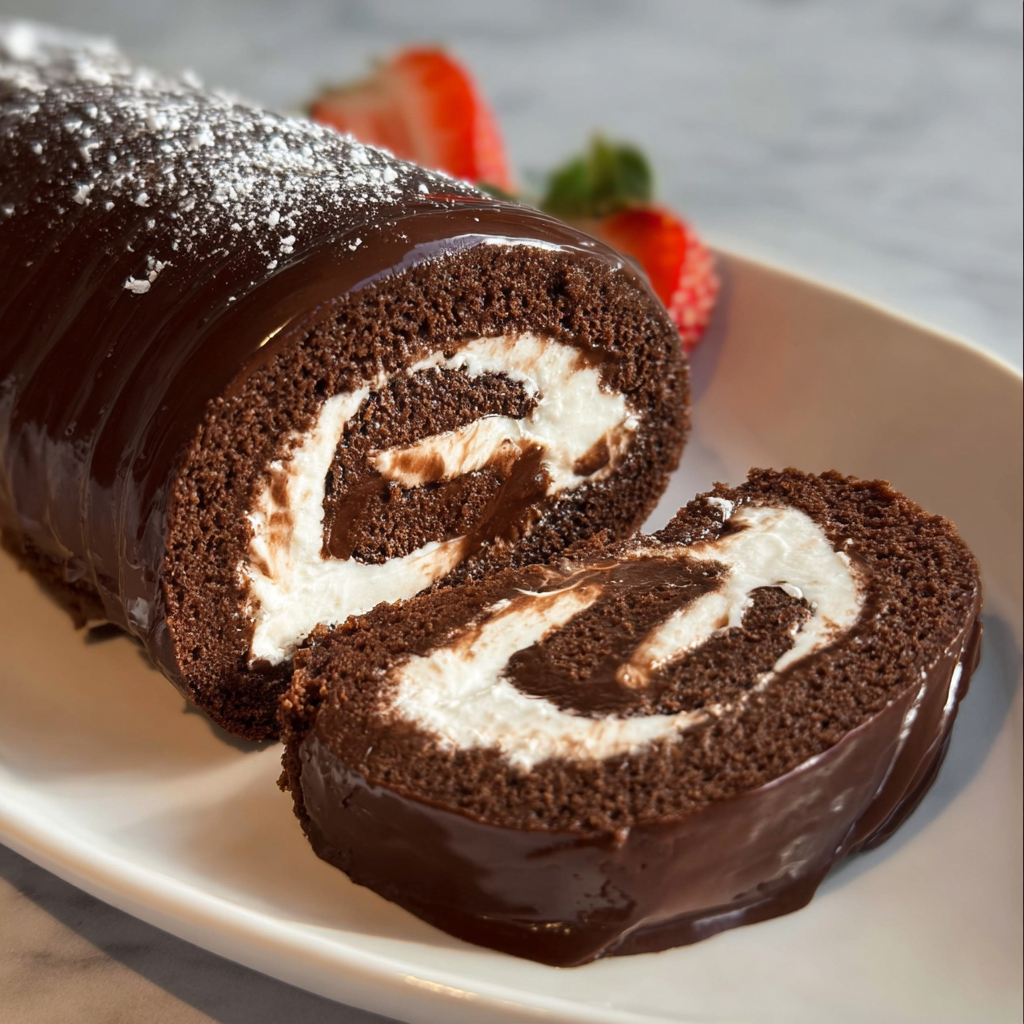
Chocolate Cake Roll with Creamy Filling & Rich Ganache: The Ultimate Patisserie Masterclass
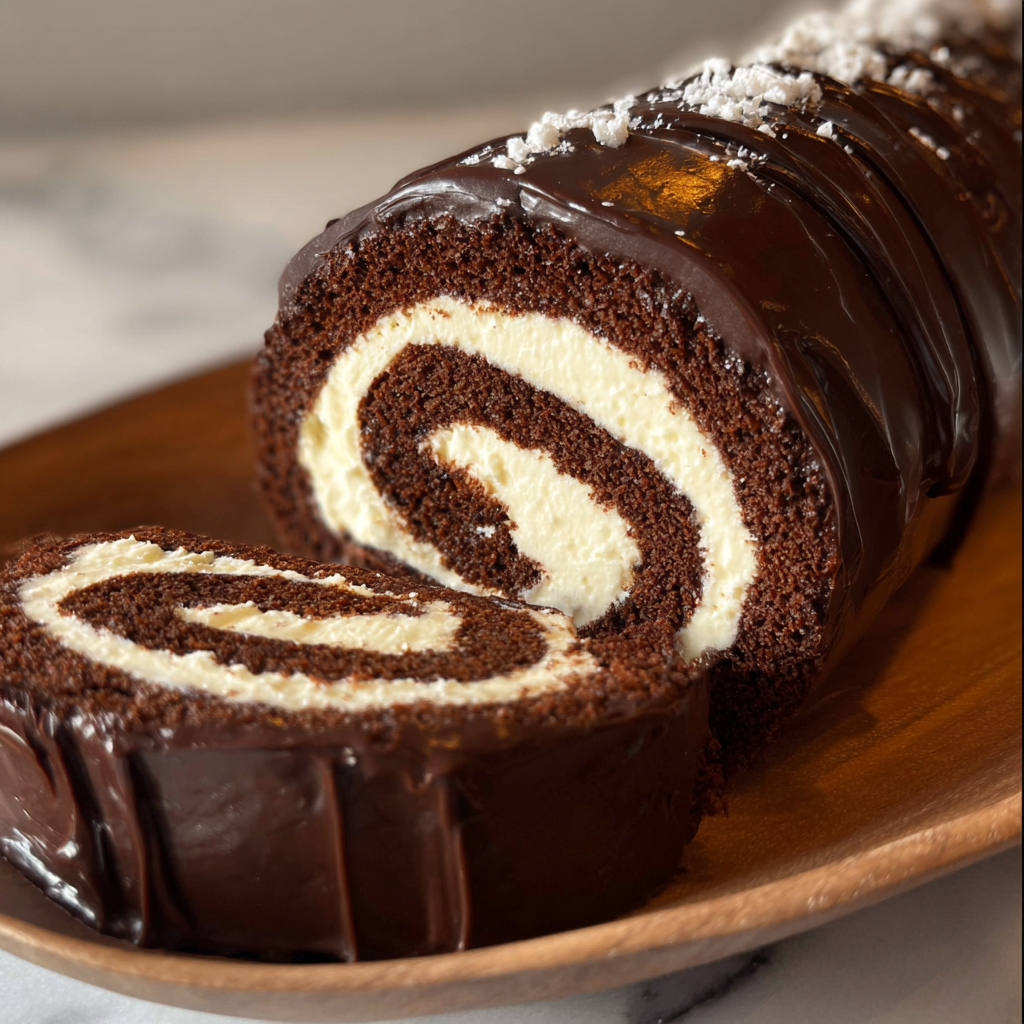
Can a dessert that appears so structurally complex actually be achieved in a standard home kitchen with just 15 minutes of active labor? According to professional baking data, the Chocolate Cake Roll with Creamy Filling & Rich Ganache (known in English as a Chocolate Swiss Roll or Roulade) is often perceived as the most difficult cake to master, yet it follows basic principles of protein elasticity. The secret lies in the thermal memory of the sponge—rolling the cake while it is still warm prevents the dreaded structural cracking that plagues 80% of novice bakers.
This recipe is semantically optimized for the home pâtissier, combining a flexible cocoa sponge, a stabilized chantilly-style filling, and a high-gloss chocolate ganache. By following this data-driven workflow, you will create a centerpiece that balances the airy lightness of a chiffon cake with the decadence of a truffle.
Ingredients List: The Architecture of the Roll
To achieve a “crack-free” roll, the moisture content and the type of cocoa used are non-negotiable variables.
1. The Flexible Cocoa Sponge
- Large Eggs (4, room temperature): Essential for the “foaming method” that creates the cake’s lift.
- Granulated Sugar (¾ cup): Provides sweetness and helps stabilize the egg foam.
- Dutch-Processed Cocoa Powder (¼ cup): Offers a darker color and lower acidity, making the cake more supple.
- All-Purpose Flour (½ cup, sifted): Provides just enough gluten for structure without making the cake tough.
- Pure Vanilla Extract (1 tsp) & A pinch of Salt: To enhance the chocolate profile.
2. The Stabilized Creamy Filling
- Heavy Whipping Cream (1 cup, chilled): High fat content (36%+) is required for a firm hold.
- Powdered Sugar (¼ cup): For sweetness and stability.
- Mascarpone or Cream Cheese (2 tbsp): The “secret” stabilizer that ensures the filling doesn’t squish out when the cake is sliced.
3. The High-Gloss Ganache
- Dark Chocolate (4 oz, 60% cocoa): Finely chopped for even melting.
- Heavy Cream (½ cup): To create the silk-like emulsion.
Substitution Tip: For a gluten-free version, replace the flour with a 1:1 gluten-free baking blend or almond flour (though the roll will be slightly more fragile). For a mocha twist, add 1 teaspoon of espresso powder to the cocoa sponge.
Timing: The Window of Elasticity
The success of a Chocolate Cake Roll is determined by the timing of the “Initial Roll.”
| Phase | Duration |
| Prep & Foaming | 10 Minutes |
| Baking | 10-12 Minutes |
| Initial Rolling | 2 Minutes (While Hot) |
| Chilling | 1 Hour |
| Total Active Time | Approx. 25 Minutes |
Data Insight: Baking the sponge at a higher temperature ($375^{\circ}F / 190^{\circ}C$) for a shorter duration prevents the edges from drying out and becoming brittle, which is the primary cause of cracking during the rolling phase.
Step-by-Step Instructions
1. The Foaming Method (H3)
Preheat your oven to 190°C (375°F). Line a 10×15 inch jelly roll pan with parchment paper. In a large bowl, beat the eggs and sugar on high speed for 5–7 minutes.
Actionable Tip: You are looking for the “Ribbon Stage.” When the whisk is lifted, the batter should fall in a thick ribbon that stays visible on the surface for 3 seconds.
2. Sifting and Folding (H3)
Sift the flour, cocoa powder, and salt together. Gently fold them into the egg foam using a spatula.
Pro Tip: Use a “figure-eight” motion to fold. Over-mixing will deflate the air bubbles, resulting in a flat, rubbery sponge that won’t roll.
3. The Flash Bake (H3)
Spread the batter evenly into the pan. Bake for 10–12 minutes. The cake should spring back when lightly touched in the center.
4. The Thermal Memory Roll (H3)
While the cake is still steaming hot, dust a clean kitchen towel with cocoa powder. Invert the cake onto the towel and peel off the parchment paper. Starting from the short end, roll the cake and the towel together tightly.
Why this matters: Rolling the cake while hot trains the fibers to stay in a curved shape. If you wait until it’s cold, the fibers will snap.
5. Filling and Final Set (H3)
Once the cake is completely cool, unroll it gently. Spread the whipped cream/mascarpone mixture over the surface, leaving a 1-inch border. Re-roll the cake (this time without the towel).
6. The Ganache Glaze (H3)
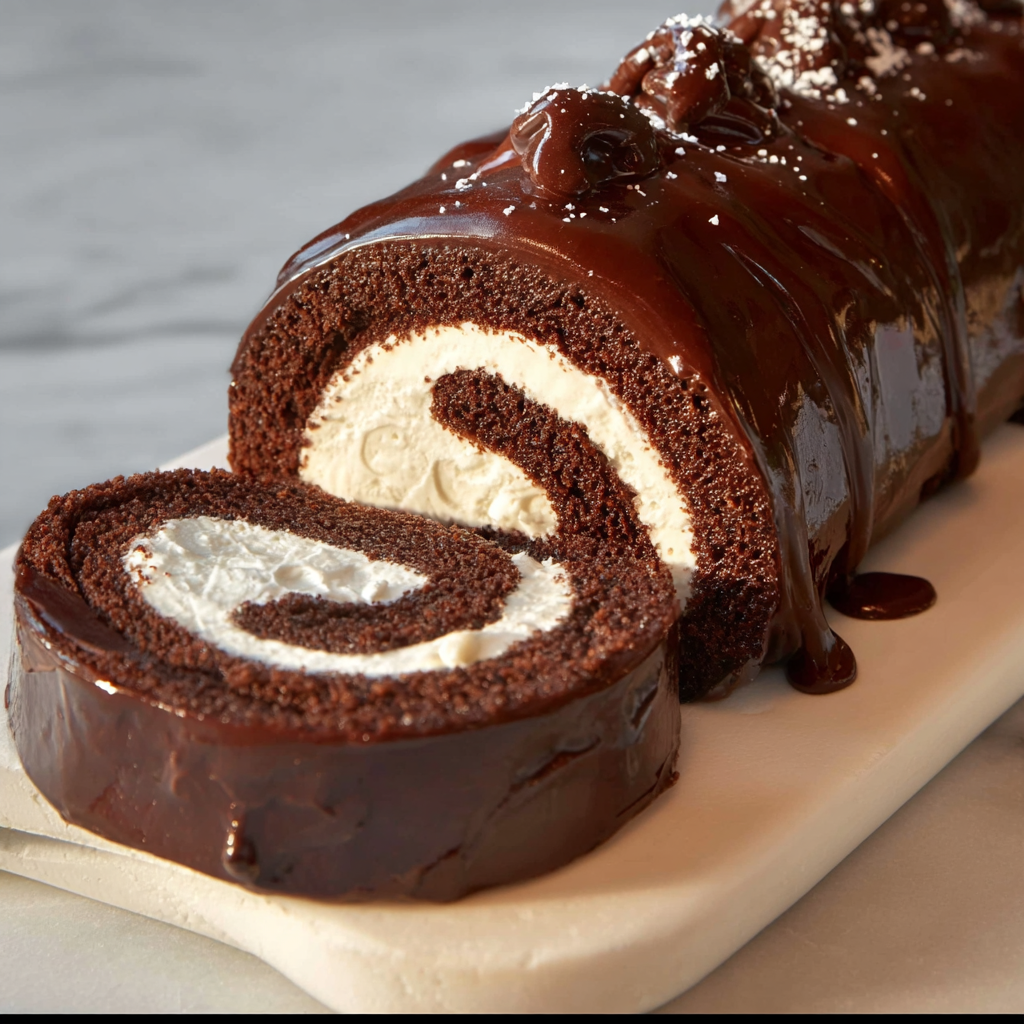
Pour hot cream over the chopped chocolate. Let it sit for 5 minutes, then stir until glossy. Pour the ganache over the chilled cake roll and let it drip down the sides for a professional look.
Nutritional Information (H2)
This dessert is a rich, energy-dense treat that provides a significant amount of Vitamin D and Calcium from the dairy components.
| Nutrient | Amount Per Slice (1/10th) |
| Calories | 315 kcal |
| Protein | 5g |
| Total Fat | 19g |
| Carbohydrates | 32g |
| Iron | 8% Daily Value |
Healthier Alternatives for the Recipe (H2)
- Low-Sugar: Use a monk fruit sweetener in both the cake and the filling. Use 85% dark chocolate for the ganache to reduce the sugar content by 40%.
- Lighter Filling: Use a Greek yogurt and honey mousse instead of heavy cream.
- Whole Grain: Use whole wheat pastry flour for a nuttier flavor and 2g of extra fiber per slice.
Serving Suggestions (H2)
- The Holiday Aesthetic: Dust with powdered sugar to resemble a “Yule Log” (Bûche de Noël) and garnish with fresh raspberries or pomegranate seeds.
- The Clean Cut: For the most attractive presentation, trim the two messy ends of the roll with a hot knife before glazing.
- Accompaniment: Serve with a scoop of vanilla bean ice cream or a glass of dessert wine like a Ruby Port.
Common Mistakes to Avoid (H2)
- Waiting to Roll: If the cake cools for even 5 minutes before the initial roll, it will lose its elasticity and crack.
- Over-baking: An over-baked cake is dry and brittle. Watch for the edges to just pull away from the pan.
- Warm Filling: Ensure the cake is stone-cold before adding the cream filling, otherwise, the cream will melt and create a soggy mess.
Storing Tips for the Recipe (H2)
- Refrigeration: This cake must be kept refrigerated due to the cream filling. It stays fresh for up to 3 days.
- Prepping Ahead: You can bake and roll the sponge in the towel up to 12 hours in advance.
- Freezing: You can freeze the filled (but un-glazed) roll for up to 1 month. Thaw in the fridge overnight before adding the ganache.
Conclusion (H2)
The Chocolate Cake Roll with Creamy Filling & Rich Ganache is the definitive proof that with the right technique, gourmet pastry is accessible to everyone. By mastering the “hot roll” and the “ribbon stage,” you can create a dessert that is as beautiful as it is delicious. Try this recipe for your next celebration, share your feedback in our review section, and subscribe for more professional baking secrets!
FAQs (H2)
Q: My cake cracked! How do I fix it?
A: Don’t panic! This is what the ganache is for. A thick layer of chocolate glaze can hide almost any structural crack, and it will still taste incredible.
Q: Can I use a regular 13×9 baking pan?
A: It is not recommended. A standard 13×9 pan is too deep and small, resulting in a cake that is too thick to roll. Use a 10×15 “Jelly Roll” pan for best results.
Q: Why is my ganache grainy?
A: This usually happens if the cream was too hot or if you stirred it too vigorously. Heat the cream until just simmering, not a rolling boil.