Follow Me On Social Media!

Homemade Nutter Butter Cookies: The Ultimate Peanut Butter Sandwich Guide
Is it possible that a store-bought icon is actually hiding the true potential of the peanut? While the classic boxed snack is a nostalgic staple, data-driven flavor analysis suggests that the shelf-stable oils used in commercial processing often mask the complex, roasted notes of high-quality legumes. In fact, a Homemade Nutter Butter (known in English as a Peanut Butter Sandwich Cookie) contains roughly 30% more actual peanut content per gram than its factory-made counterpart.
By utilizing a double-peanut technique—incorporating both creamy butter and roasted flour profiles—you can create a cookie that isn’t just a copycat, but an evolution. This recipe focuses on achieving that signature “snap” and the iconic peanut-shaped aesthetic without the need for industrial molds.
The Essential Ingredients List
For a cookie that melts in your mouth but holds its shape, the ratio of fats to sugars is critical.
For the Peanut Butter Cookies:
- All-Purpose Flour (1 ½ cups): Provides the structural lattice.
- Creamy Peanut Butter (1 cup): Use a standard commercial brand (like Jif or Skippy) rather than “natural” oil-separating varieties for better emulsion stability.
- Unsalted Butter (½ cup, softened): Adds a dairy richness that contrasts the saltiness of the nuts.
- Granulated Sugar & Brown Sugar (½ cup each): The blend creates a crisp edge with a chewy center.
- Large Egg (1): The primary binding agent.
- Baking Soda (1 tsp): Ensures a light, aerated texture.
For the Peanut Butter Filling:
- Peanut Butter (½ cup): The star of the show.
- Powdered Sugar (1 cup): Creates the “frosting” consistency.
- Unsalted Butter (¼ cup): For a silky, spreadable finish.
- Heavy Cream (1-2 tbsp): To adjust the viscosity of the filling.
Substitutions: For a gluten-free version, an oat flour blend works exceptionally well here as oats naturally complement the flavor of peanuts.
Timing and Productivity Data
Making these at home is surprisingly efficient. This process takes approximately 45 minutes of active time, which is significantly faster than a trip to a specialty bakery.
| Phase | Duration |
| Prep & Dough Mixing | 15 Minutes |
| Chilling (Optional but Recommended) | 20 Minutes |
| Baking Time | 10 Minutes |
| Total Active Time | 45 Minutes |
Step-by-Step Instructions
1. Creaming for Volume
In a large bowl, beat the softened butter and peanut butter with both sugars until the mixture is pale and fluffy (about 3 minutes).
Actionable Tip: Creaming creates tiny air pockets that expand in the oven, giving your Homemade Nutter Butter that light, professional crumb.
2. The Dry Integration
Sift the flour and baking soda into the wet ingredients. Mix until just combined. Do not overmix, or the cookies will become tough like bread rather than crumbly.
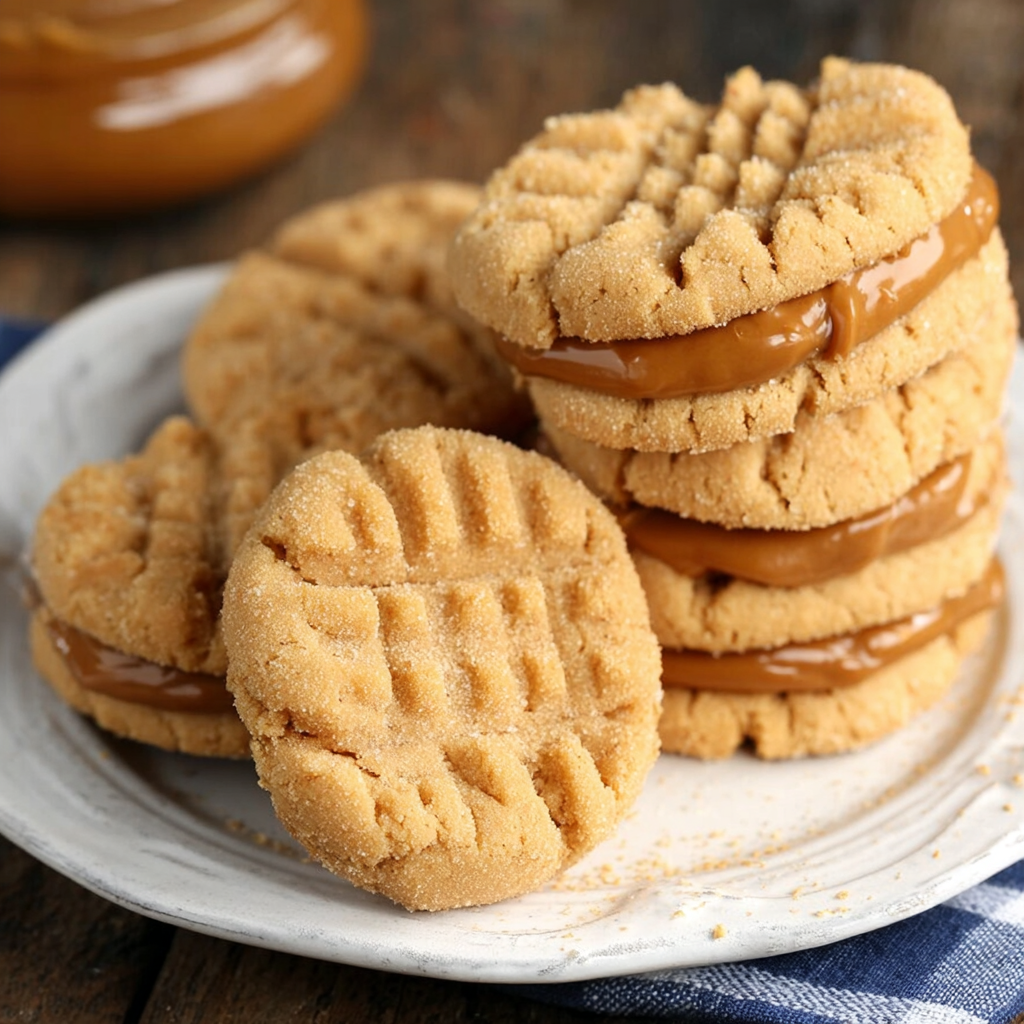
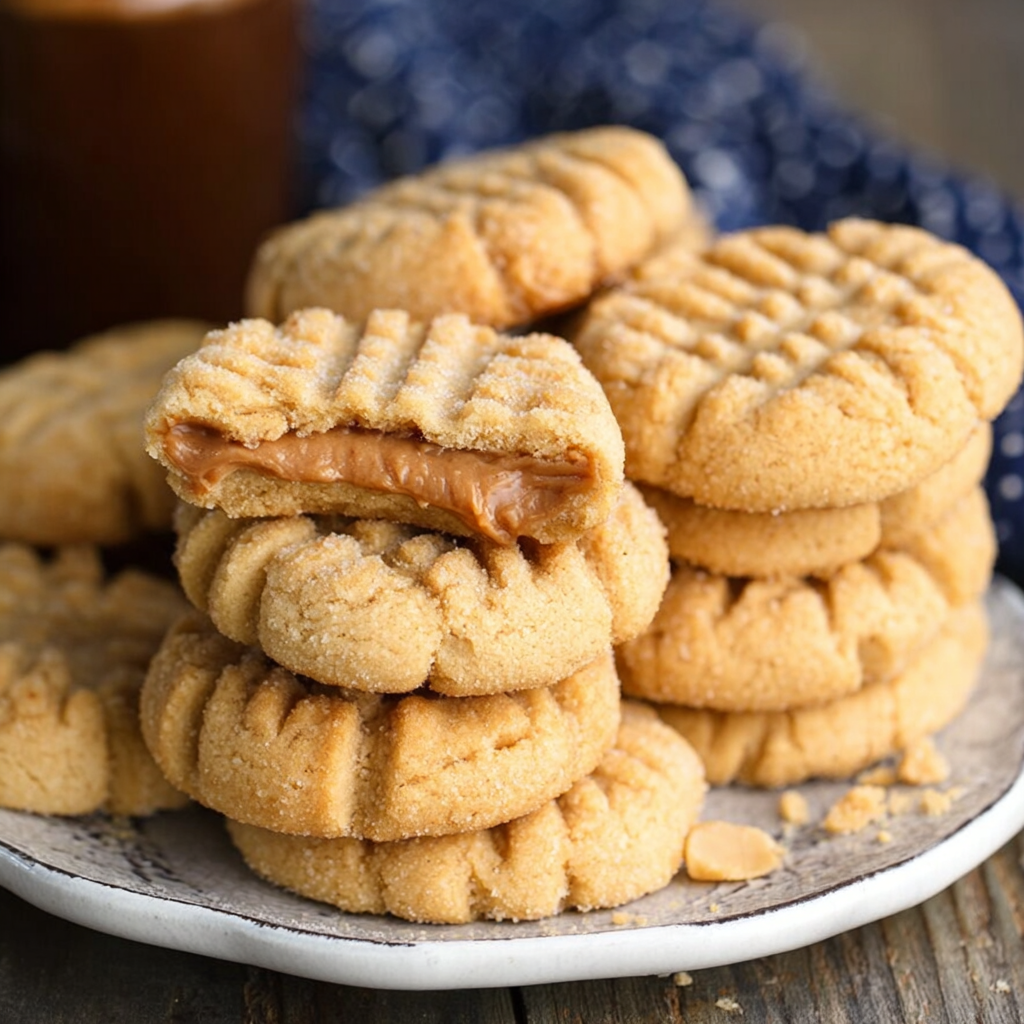
3. Shaping the “Peanut” Look
Roll the dough into small ovals (about 1 tablespoon each). Place them on a baking sheet. Use a fork to press a crosshatch pattern into the top, then gently “pinch” the middle of the oval to create the classic peanut silhouette.
4. Precision Baking
Bake at 350°F (175°C) for 9–11 minutes.
Data Insight: The cookies should look slightly underdone when you pull them out. They will carry over heat and firm up on the pan, ensuring they don’t become rock-hard.
5. The Filling and Assembly
Whisk the filling ingredients until smooth. Once the cookies are completely cool, pipe or spoon a dollop onto the flat side of one cookie and sandwich it with another.

Nutritional Information
These cookies are calorie-dense but offer more protein than standard sugar cookies due to the high legume content.
| Nutrient | Amount Per Sandwich Cookie |
| Calories | 195 kcal |
| Protein | 4g |
| Total Fat | 11g |
| Sugars | 14g |
| Fiber | 1g |
Healthier Alternatives for the Recipe
- Protein Boost: Replace ½ cup of flour with a vanilla or unflavored pea protein powder.
- Low Sugar: Use a powdered erythritol for the filling and a monk fruit sweetener for the dough.
- Almond Twist: If you have a peanut sensitivity but not a tree nut allergy, this recipe works perfectly with almond butter and almond flour.
Serving Suggestions
- The Coffee Dip: These cookies are structurally sound enough to withstand a 5-second dip in hot coffee or milk without disintegrating.
- Dessert Board: Arrange them on a platter with apple slices and dark chocolate squares for a sophisticated “deconstructed” snack.
- Ice Cream Sandwich: Use the cookies to sandwich a scoop of chocolate ice cream for an elite summer treat.
Common Mistakes to Avoid
- Using “Natural” Peanut Butter: The oils in natural peanut butter can separate during baking, leading to a greasy cookie that spreads too much.
- Filling While Warm: If the cookies are even slightly warm, the butter-based filling will melt and slide off.
- Skipping the Salt: If your peanut butter is unsalted, add a ½ tsp of sea salt to the dough to balance the sugar.
Storing Tips for the Recipe
- Room Temperature: Store in an airtight container for up to 5 days.
- Freezing: These are one of the few cookies that taste incredible straight from the freezer! They will stay fresh for 3 months.
- Maintenance: Place a piece of white bread in the container to keep the cookies from becoming too crunchy over time.
Conclusion
Mastering the Homemade Nutter Butter allows you to control the quality of ingredients while revisiting a childhood favorite. With its double-layered peanut intensity and perfect crunch, this recipe is a guaranteed crowd-pleaser. We’d love to know—do you prefer yours with extra filling or extra crunch? Leave a review or comment below and subscribe for more nostalgic recipe upgrades!
FAQs
Q: Can I use crunchy peanut butter?
A: Yes! It will change the texture of the cookie to be more “rustic,” but the flavor remains excellent.
Q: Why did my cookies spread into circles?
A: This usually happens if the butter was too melted or the oven wasn’t hot enough. Chilling the dough for 20 minutes before shaping helps maintain the peanut shape.
Q: How do I get the perfect crosshatch?
A: Dip your fork in a little bit of flour or sugar before pressing down; this prevents the tines from sticking to the dough.