Follow Me On Social Media!

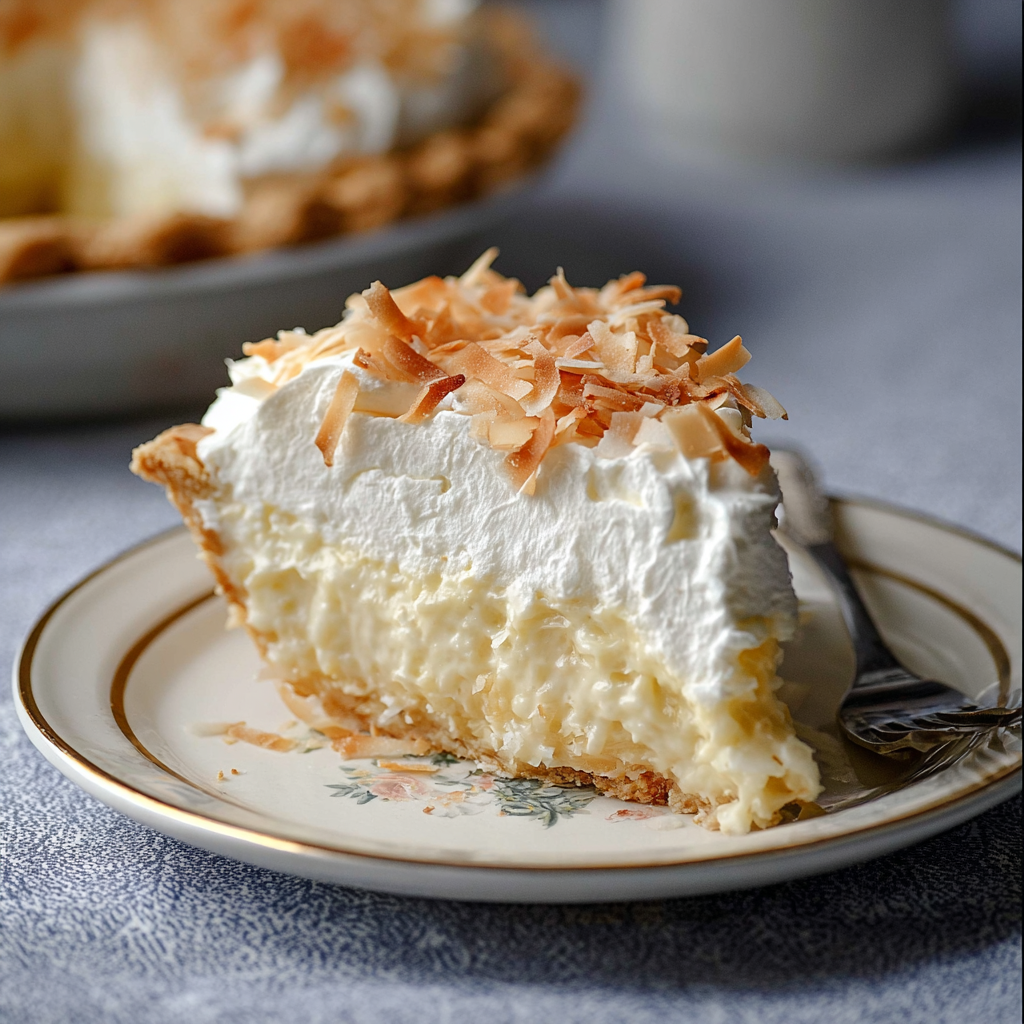
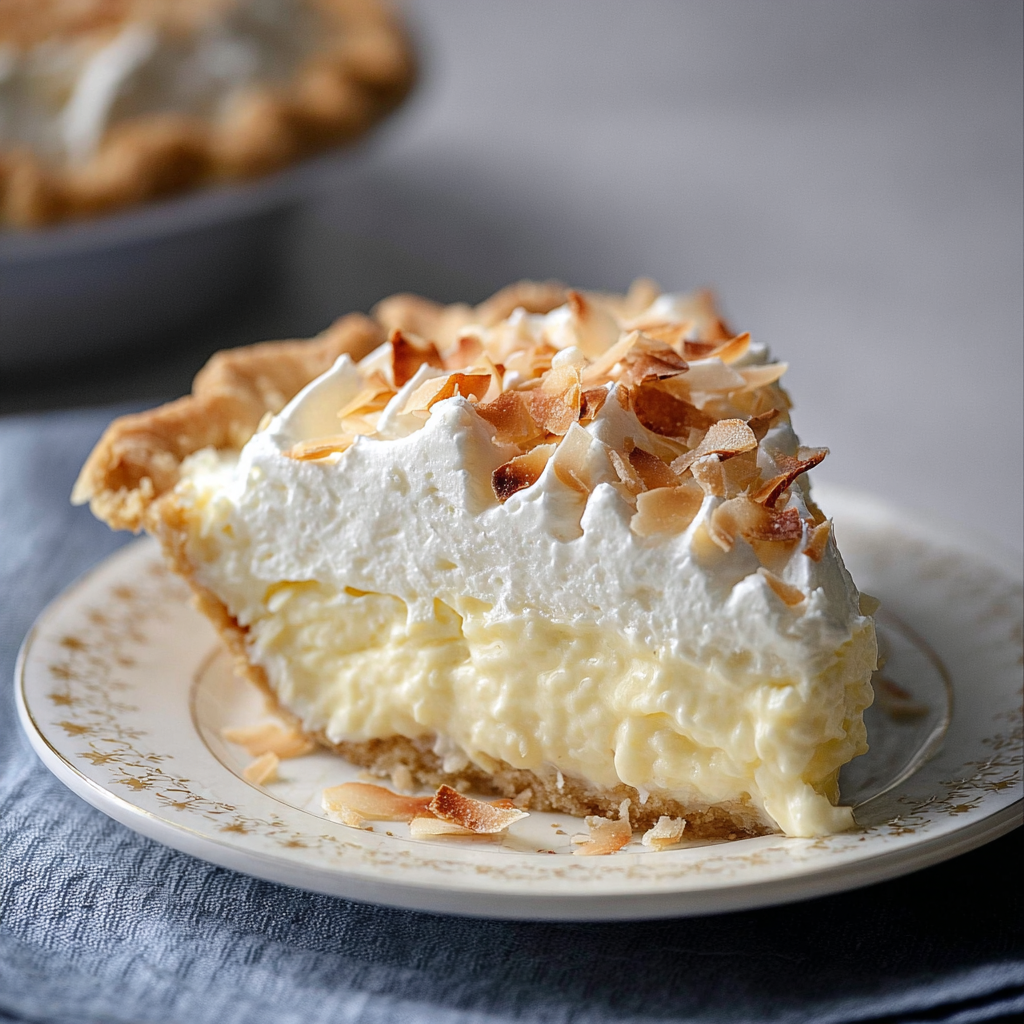
Grandma’s Coconut Cream Pie – Creamy, Dreamy & Classic
Introduction
What makes a dessert truly timeless? It’s the kind of recipe passed down through generations—like this Grandma’s Coconut Cream Pie. With its silky coconut custard filling, buttery crust, and fluffy whipped topping, this pie is pure comfort in every bite.
Inspired by classic Southern baking traditions, this pie captures the rich, nostalgic flavors you’d find in a family kitchen. Whether you’re serving it for holidays, gatherings, or just a sweet treat at home, this dessert never fails to impress.
Ingredients List
For the Pie Crust:
- 1 pre-baked 9-inch pie crust (homemade or store-bought)
For the Coconut Filling:
- 1 cup granulated sugar
- ¼ cup cornstarch
- ¼ tsp salt
- 2 ½ cups whole milk
- 4 large egg yolks
- 2 tbsp unsalted butter
- 1 ½ tsp vanilla extract
- 1 cup sweetened shredded coconut
For the Topping:
- 1 ½ cups heavy whipping cream
- 2 tbsp powdered sugar
- ½ tsp vanilla extract
- Toasted coconut flakes (optional)
Substitutions & Tips:
- Use coconut milk for a stronger coconut flavor.
- Swap whole milk with almond milk for a lighter version.
- Add coconut extract for an extra boost of flavor.
Timing
- Prep Time: 20 minutes
- Cook Time: 15 minutes
- Chill Time: 4 hours
- Total Time: ~4 hours 35 minutes
⏱️ Chilling is essential to achieve the perfect creamy, set texture.
Step-by-Step Instructions
Step 1: Prepare the Crust
Pre-bake your pie crust until golden brown and let it cool completely.
Step 2: Make the Custard Base
In a saucepan, whisk together sugar, cornstarch, and salt.
Step 3: Add Milk
Gradually whisk in milk over medium heat, stirring constantly until thickened.
Step 4: Temper the Egg Yolks
Slowly add a small amount of hot mixture into egg yolks, then return to the pan.
Tip: This prevents the eggs from scrambling.
Step 5: Finish the Filling
Cook until thick, then remove from heat. Stir in butter, vanilla, and shredded coconut.
Step 6: Assemble the Pie
Pour the filling into the cooled crust and smooth the top.
Step 7: Chill
Refrigerate for at least 4 hours until fully set.
Step 8: Add Topping
Whip cream with powdered sugar and vanilla, then spread over the pie. Garnish with toasted coconut.
Nutritional Information (Per Slice)
- Calories: 420 kcal
- Carbohydrates: 45g
- Fat: 24g
- Protein: 6g
- Sugar: 30g
📊 Rich and indulgent—best enjoyed as a special treat.
Healthier Alternatives for the Recipe
- Use low-fat milk instead of whole milk.
- Reduce sugar by 20–30%.
- Use light whipped cream or coconut whipped cream.
- Try a graham cracker crust for a lighter base.
Serving Suggestions
- Serve chilled for the best texture.
- Pair with coffee or tea.
- Add fresh fruit like pineapple or berries.
- Drizzle with caramel or chocolate sauce.
🥥 A perfect dessert for holidays and family gatherings.
Common Mistakes to Avoid
- Not stirring constantly: Can cause lumps or burning.
- Skipping tempering eggs: Leads to scrambled texture.
- Not chilling enough: Filling won’t set properly.
- Overwhipping cream: Can turn into butter.
Storing Tips for the Recipe
- Store covered in the refrigerator for up to 3 days.
- Do not freeze (texture may change).
- Add whipped topping just before serving for freshness.
Conclusion
This Grandma’s Coconut Cream Pie is the perfect combination of creamy, sweet, and nostalgic flavors. With its silky filling and airy whipped topping, it’s a dessert that brings comfort and joy to every table. Bake it today, share your experience, and subscribe for more classic recipes!
FAQs
1. Can I use coconut milk instead of whole milk?
Yes, it enhances the coconut flavor.
2. Why is my filling runny?
It may not have been cooked long enough or chilled properly.
3. Can I make this ahead of time?
Yes, it’s best made a day in advance.
4. Can I use a store-bought crust?
Absolutely, for convenience.
5. Can I make it dairy-free?
Yes, use plant-based milk and coconut cream alternatives.