Follow Me On Social Media!

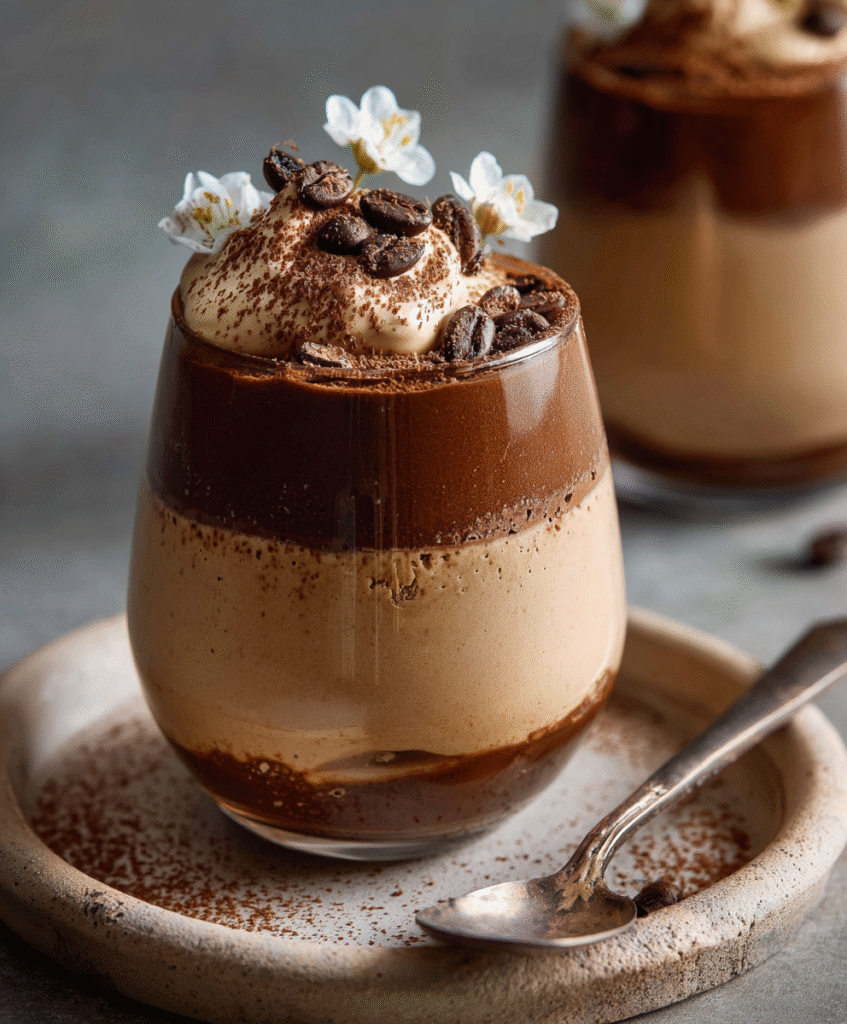
Coffee Mousse Recipe: The Airy, Caffeinated Cloud

Introduction
Did you know that 64% of Americans drink coffee daily, yet less than 5% utilize this complex flavor profile in desserts beyond tiramisu? We often treat coffee as a morning utility rather than a culinary luxury. But what if you could transform your morning brew into a dessert so light it defies gravity?
This Coffee Mousse recipe challenges the belief that French desserts require a culinary degree. By harnessing the science of aeration and fat stabilization, we turn simple heavy cream and espresso into a sophisticated, velvety treat. Whether you are a die-hard espresso enthusiast or just looking for a “pick-me-up” after dinner, this guide will teach you the difference between soft and stiff peaks, how to prevent grainy texture, and why instant coffee powder is actually the secret weapon of pastry chefs.
Ingredients List
To achieve that cloud-like texture, the fat content and temperature of your ingredients are non-negotiable.
The Flavor Base
- Instant Coffee Granules (2 tbsp):
- Sensory Note: Do not use brewed liquid coffee! It adds too much water, which will make the mousse runny. Instant espresso powder provides intense, concentrated flavor without the moisture volume.1
- Hot Water (1 tbsp): Just enough to dissolve the coffee into a thick syrup.
- Granulated Sugar (½ cup): Provides sweetness and structure.
The Structure
- Heavy Whipping Cream (2 cups, cold): Look for 36% milk fat or higher.
- Science Check: Low-fat creams will not hold air bubbles, resulting in a soup rather than a mousse.
- Egg Yolks (3 large): Use fresh, room-temperature yolks. They create a rich custard base (pâte à bombe style) that gives the mousse its silky mouthfeel.
- Vanilla Extract (1 tsp): Rounds out the bitterness of the coffee.
Optional Stabilizer
- Gelatin (1 tsp) + Water (1 tbsp): Recommended if you plan to pipe the mousse or serve it in a mold. If serving in cups, you can omit this.
Timing
This recipe requires patience during the chilling phase to set properly.
- Preparation Time: 20 minutes.
- Cooking Time: 5 minutes (for the custard base).
- Chilling Time: 4 hours (minimum).2
- Total Time: Approx. 4 hours 25 minutes.
Data Insight: Homemade mousse contains approximately 50% less sugar than commercial pudding cups and zero artificial thickeners like carrageenan.
Step-by-Step Instructions
Step 1: The Coffee Syrup
In a small bowl, mix the instant coffee granules with the hot water. Stir until fully dissolved and syrupy. Set aside to cool slightly.
- Tip: If you want a mocha twist, add 1 tablespoon of cocoa powder to this mixture now.
Step 2: The Custard Base (The Sabayon)
Fill a medium saucepan with 1 inch of water and bring to a simmer. Place a heatproof bowl on top (ensure the bottom doesn’t touch the water). Whisk the egg yolks and sugar in the bowl constantly for 5-7 minutes.
- The Goal: You are looking for the “ribbon stage”—the mixture should be pale yellow, hot to the touch (160°F for food safety), and fall off the whisk in thick ribbons. Remove from heat and whisk in the coffee syrup and vanilla. Let cool completely.
Step 3: The Aeration
While the coffee base cools, whip the cold heavy cream in a large chilled bowl. Beat until stiff peaks form.
- Visual Cue: When you lift the beaters, the cream should stand straight up without drooping. Do not overbeat, or you will make coffee butter.
Step 4: The Fold
Gently fold one-third of the whipped cream into the cooled coffee mixture to lighten it. Then, carefully fold in the remaining whipped cream.
- Technique: Use a rubber spatula to cut through the center and fold over. Do not stir vigorously, or you will deflate the air bubbles you worked so hard to create.
Step 5: Portion and Set
Spoon or pipe the mousse into serving glasses or espresso cups. Cover and refrigerate for at least 4 hours to allow the fat to re-crystallize and set the structure.
Nutritional Information
This is a rich dessert, meant to be savored in small portions. Breakdown per serving (based on 6 servings):
| Nutrient | Amount per Serving | Daily Value % |
| Calories | 310 kcal | 15% |
| Total Fat | 28g | 36% |
| Saturated Fat | 17g | 85% |
| Carbohydrates | 12g | 4% |
| Protein | 3g | 6% |
| Caffeine | ~30mg | – |
- Data Insight: The high fat content produces high satiety, meaning a small 4oz serving is often satisfying enough to curb sweet cravings compared to high-sugar, low-fat alternatives.
Healthier Alternatives for the Recipe
Adapt your Coffee Mousse to fit dietary needs without losing the luxury:
- Dairy-Free / Vegan: Use Coconut Cream (chilled overnight, solid part only) instead of heavy cream.3 Skip the egg yolks and use whipped aquafaba (chickpea water) folded into melted dairy-free chocolate and coffee.
- Keto / Sugar-Free: Swap granulated sugar for powdered Erythritol or Allulose. These sweeteners dissolve well and don’t spike blood sugar. The heavy cream and eggs are naturally keto-friendly.4
- Lower Fat: Replace half of the heavy cream with Greek Yogurt. The texture will be tangier and denser (like a cheesecake mousse) but significantly higher in protein and lower in calories.
Serving Suggestions
Presentation is key for this elegant dessert:
- The Classic Garnish: Top with chocolate-covered espresso beans for a crunchy contrast.
- Texture: Crumble Amaretti cookies or biscotti at the bottom of the glass before filling for a hidden crunch.
- Cocoa Dusting: Use a fine sieve to dust unsweetened cocoa powder over the top right before serving.
- Boozy Twist: Add a splash of Kahlúa or Baileys into the coffee syrup in Step 1 for an adult version.
Common Mistakes to Avoid
Ensure airy perfection by dodging these errors:
- Warm Cream: If your cream isn’t fridge-cold, it won’t whip properly. Chill your bowl and beaters for 10 minutes beforehand for insurance.
- Folding Warm Base: If the egg/coffee mixture is still warm when you add the whipped cream, the cream will melt, destroying the air bubbles and resulting in a soup.
- Grainy Coffee: Using ground coffee beans instead of instant powder will leave gritty sediment in the mousse. You must use a soluble coffee.
- Over-whipping: If the cream looks curdled or yellow, you have gone too far (churning butter). Stop immediately. You might be able to save it by stirring in a little liquid cream, but the texture will be compromised.
Storing Tips for the Recipe
- Refrigerator: Store covered in the fridge for up to 3 days. The texture is best within the first 24 hours.
- Freezing: You can freeze coffee mousse! It turns into a delightful semifreddo (semi-frozen dessert). Freeze in airtight containers for up to 1 month. Thaw in the fridge for 30 minutes before eating.
- Odors: Dairy absorbs fridge odors easily. Ensure your container is sealed tightly or covered well with plastic wrap.
Conclusion
This Coffee Mousse proves that you don’t need a bakery to experience high-end pastry textures. It is the perfect balance of bitter and sweet, light and rich—a sophisticated end to any meal that takes less than 30 minutes of active work.
Ready for a caffeine cloud? Get your whisk ready! If you try this recipe, please leave a 5-star rating below. Do you prefer it with or without the chocolate shavings? Let us know in the comments! Subscribe for more dessert science.
FAQs
Can I use brewed espresso?
You can, but you must reduce it. Brew 2 shots of espresso and simmer them down until you have 2 tablespoons of liquid. Using full-volume liquid coffee will make the mousse watery.
Is it safe to eat raw egg yolks?
In this recipe, we cook the yolks over a water bath (Step 2) to 160°F, which pasteurizes them and makes them safe to eat. If you are immunocompromised, buy pasteurized eggs or use a gelatin-based (egg-free) recipe.
Can I use decaf coffee?
Absolutely. The caffeine content does not affect the chemical structure of the mousse. Use decaf instant granules for a late-night treat.
Why did my mousse separate?
This usually happens if the chocolate/coffee base was too hot when folded into the cold cream, or if the mixture was over-mixed. Temperature control is the most important variable.
Can I use a hand mixer?
Yes, a hand mixer is perfect for whipping the cream. However, for the egg yolk mixture over the stove, a manual hand whisk is better to control the speed and prevent the eggs from scrambling.