Follow Me On Social Media!

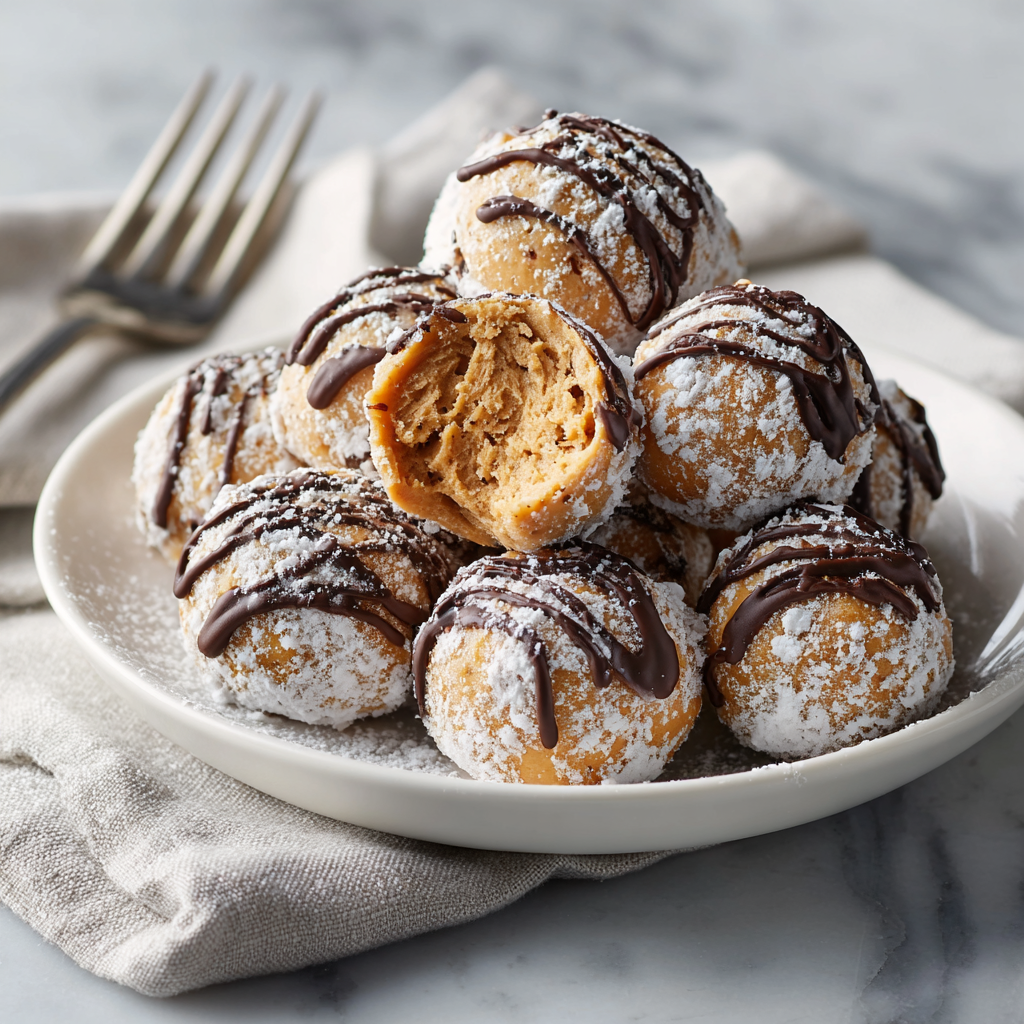
Freshly Made Peanut Butter Balls: The Ultimate No-Bake Treat
Introduction
Did you know that the average American will eat nearly 3,000 peanut butter and jelly sandwiches in their lifetime? We are a nation obsessed with peanut butter, yet 90% of its consumption is limited to bread. Why limit such a versatile ingredient?
Freshly Made Peanut Butter Balls (often affectionately known as “Buckeyes” in the Midwest) are the confectionery answer to our national obsession. They offer the perfect ratio of salty, creamy peanut butter to a crisp, sweet chocolate shell, all without ever turning on the oven. Whether you are looking for a high-energy protein fix or a nostalgic holiday sweet, this recipe is the gold standard. In this guide, we will explore the science of emulsification to prevent oily dough, the temperature tricks for a perfect chocolate dip, and how to create Freshly Made Peanut Butter Balls that rival any high-end chocolatier.
Ingredients List
To achieve a center that is smooth rather than gritty, and a shell that snaps rather than melts in your hand, ingredient selection is critical.
The Peanut Butter Core
- 1 ½ cups Creamy Peanut Butter: Crucial: Use a standard commercial brand (like Jif or Skippy). Natural peanut butters separate and can make the dough too oily to hold its shape.
- ½ cup Unsalted Butter, softened: Room temperature is key for blending.
- 3 cups Powdered Sugar (Confectioners’ Sugar): Sifted. This acts as the structure, replacing flour in this no-bake cookie.
- 1 tsp Vanilla Extract: Enhances the sweetness.
- ¼ tsp Salt: If using unsalted butter. If your PB is very salty, you can omit this.
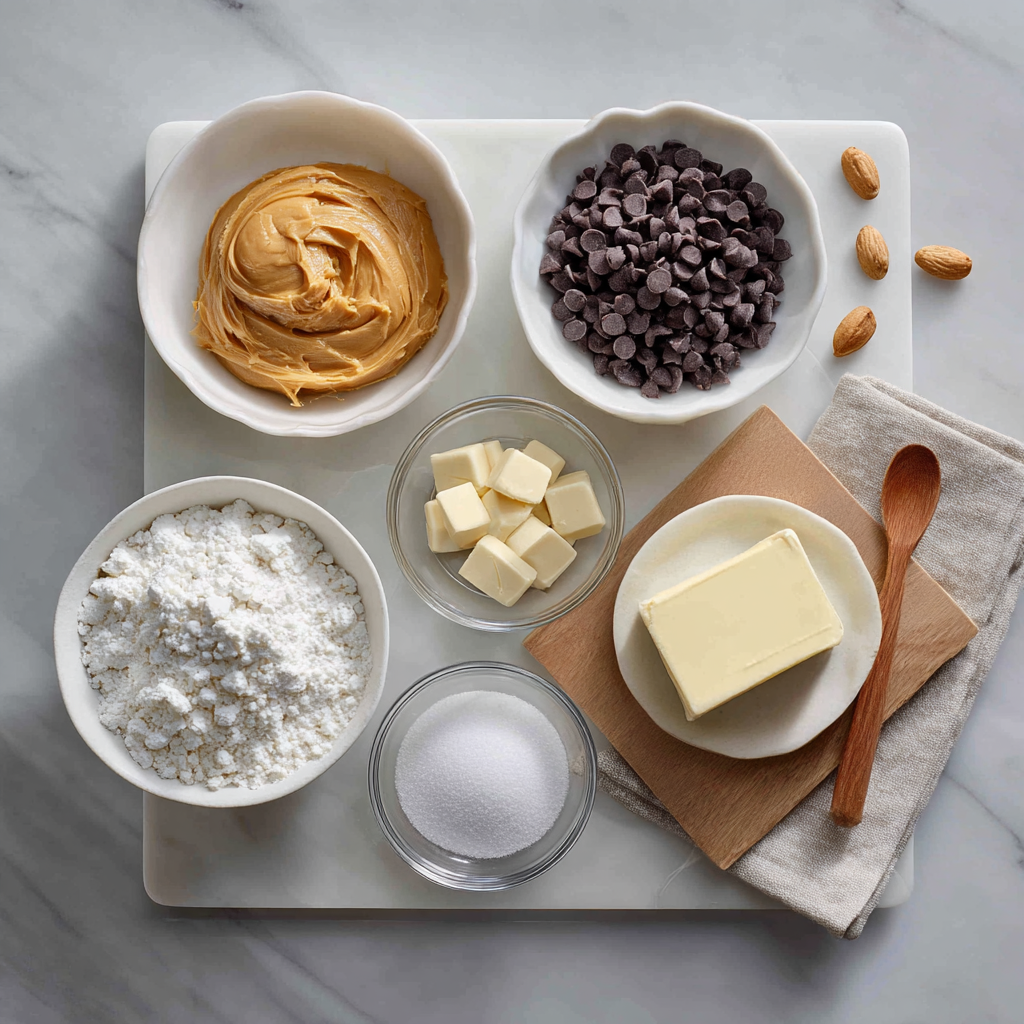
The Chocolate Shell
- 2 cups Semi-Sweet Chocolate Chips: Semi-sweet provides a sophisticated balance to the sugary center. Milk chocolate can make it cloyingly sweet.
- 1 tbsp Coconut Oil or Shortening: This is the secret to a glossy finish and a smoother melting consistency. It thins the chocolate for easier dipping.
Sensory Note: When mixing the dough, it should feel like Play-Doh—pliable, smooth, and not sticky to the touch. If it sticks to your fingers, it needs more sugar.
Timing
Because this is a no-bake recipe, the “cooking” time is actually “chilling” time.
- Preparation Time: 20 minutes
- Chilling Time: 30 minutes (minimum)
- Dipping Time: 20 minutes
- Total Time: ~1 hour 10 minutes
Data Insight: Making peanut butter balls consumes 85% less energy than baking a batch of cookies, as it eliminates the need for an oven preheat and bake cycle, making this an eco-friendly dessert option.
Step-by-Step Instructions
Step 1: Cream the Fats
In a large mixing bowl (or stand mixer fitted with a paddle attachment), beat the peanut butter and softened butter until creamy and uniform. This takes about 2 minutes on medium speed.
Step 2: Incorporate the Structure
Gradually add the powdered sugar, one cup at a time.
- Actionable Tip: Turn the mixer to “Low” before adding sugar to avoid a white dust cloud in your kitchen. Add the vanilla and salt. Mix until a stiff dough forms.
Step 3: Roll and Shape
Line a baking sheet with parchment paper or wax paper. Scoop about 1 tablespoon of dough and roll it between your palms into a smooth sphere.
- Consistency Check: The warmth of your hands helps smooth out any cracks. Place the balls on the lined sheet.
Step 4: The Critical Chill
Insert a toothpick into the center of each ball. Place the baking sheet in the freezer for 30 minutes.
- Why? If you dip a room-temperature ball into hot chocolate, it will disintegrate or slide off the toothpick. The cold friction keeps it secure.
Step 5: The Chocolate Bath
In a microwave-safe bowl, combine chocolate chips and coconut oil. Microwave in 30-second intervals, stirring in between, until completely smooth.
- Temp Check: Do not overheat! The chocolate should be fluid but not scalding hot.
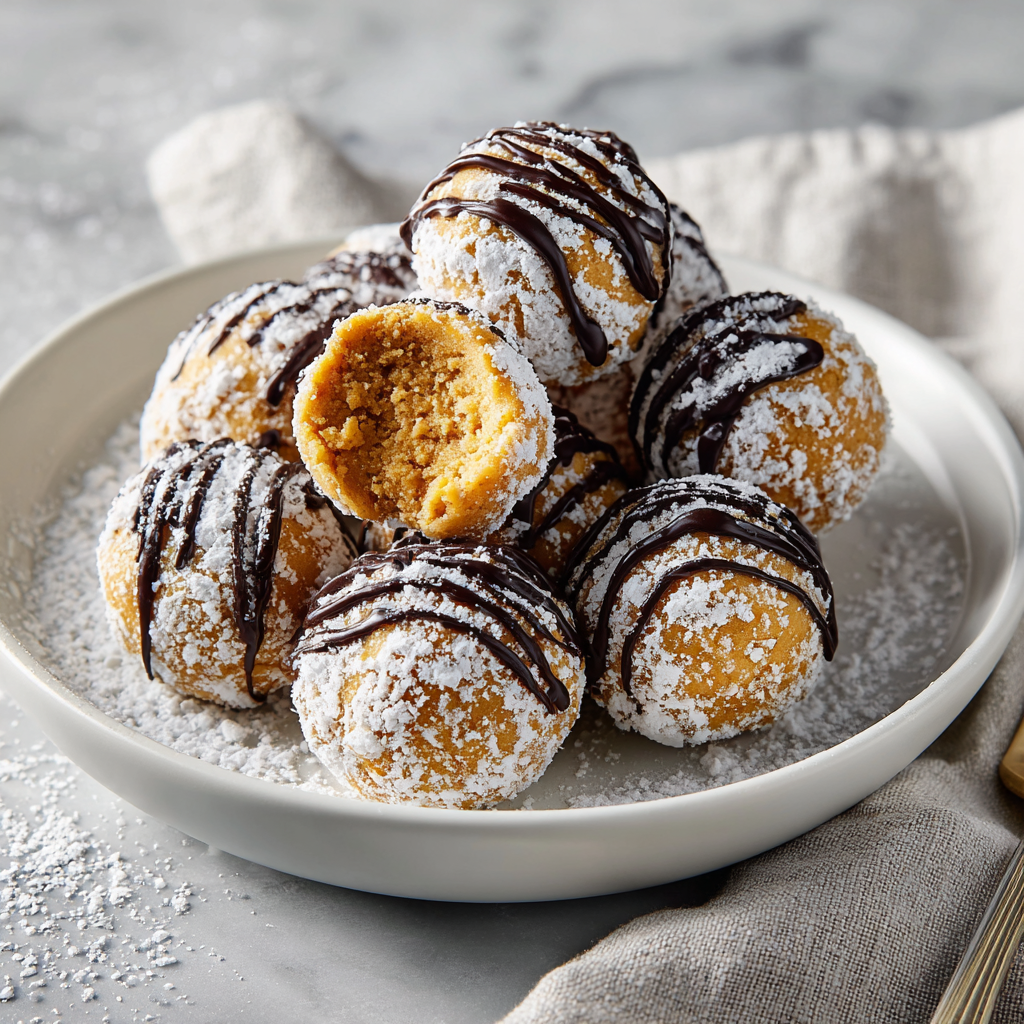
Step 6: The Dip
Holding the toothpick, dip each chilled peanut butter ball into the chocolate.
- Buckeye Style: Leave a small circle of peanut butter showing at the top.
- Full Truffle: Submerge completely.Let the excess chocolate drip off, then return to the parchment paper.
Step 7: The Final Set
Remove the toothpicks. Use a clean finger or a small spoon to smooth over the toothpick hole. Refrigerate for 15 minutes to set the chocolate.
Nutritional Information
These are energy-dense treats. Below is the estimated breakdown per ball (based on a yield of 30 balls).
| Nutrient | Amount per Serving | % Daily Value* |
| Calories | 145 kcal | 7% |
| Total Fat | 9g | 14% |
| Saturated Fat | 4g | 20% |
| Carbohydrates | 16g | 6% |
| Sugars | 14g | – |
| Protein | 3g | 6% |
| Cholesterol | 5mg | 2% |
Note: While high in sugar, the peanut butter provides a decent hit of protein and healthy monounsaturated fats, making these a better energy booster than pure sugar candies.
Healthier Alternatives for the Recipe
To transform these from a dessert into a functional “Energy Bite,” try these modifications:
- The “Natural” Fix: If you insist on using natural peanut butter (the kind you stir), add ¼ cup of oat flour or coconut flour to absorb the excess oil and bind the dough.
- Sugar Swap: Replace the powdered sugar with ¼ cup maple syrup and increase the dry ingredients (oats or almond flour) until the texture is rollable. This lowers the glycemic index.
- Dark Chocolate: Use 70% or higher dark chocolate for the coating. This increases the antioxidant content and lowers the sugar.
- Protein Boost: Add a scoop of vanilla whey or collagen protein powder to the peanut butter mixture. You may need to add a splash of almond milk if it gets too dry.
Serving Suggestions
Freshly Made Peanut Butter Balls are versatile crowd-pleasers.
- The Holiday Tin: These are the ultimate Christmas cookie exchange item because they travel well and don’t stale like baked goods.
- Ice Cream Garnish: Chop them up and sprinkle over vanilla bean ice cream for a homemade “moose tracks” vibe.
- The “Pop” Presentation: Leave them on lollipop sticks for a mess-free party treat that kids love.
- Espresso Pairing: The saltiness of the peanut butter pairs exceptionally well with a bitter shot of espresso or a dark roast coffee.
Common Mistakes to Avoid
Even with no baking involved, texture issues can arise.
- The “Seized” Chocolate:
- The Issue: Getting a drop of water into melting chocolate turns it into a gritty, hard paste instantly.
- The Fix: Ensure all bowls and spoons are completely dry. Never cover warm chocolate with a lid that could create condensation.
- The “Slider”:
- The Issue: The ball falls off the toothpick into the chocolate abyss.
- The Fix: The balls weren’t cold enough. Freeze them longer.
- Oily Dough:
- The Issue: Using warm butter or natural peanut butter.
- The Fix: Add more powdered sugar until it stiffens, or refrigerate the dough before rolling.
- Chocolate Bloom:
- The Issue: White streaks appearing on the chocolate after drying.
- The Fix: This happens if the chocolate got too hot or cooled too fast. It’s purely aesthetic and still safe to eat.
Storing Tips for the Recipe
- Refrigerator: Store in an airtight container for up to 2 weeks. They taste best cold, as the snap of the chocolate contrasts with the soft center.
- Freezer: These are freezer champions.
- Method: Flash freeze on a tray, then transfer to a ziplock bag.
- Duration: Good for up to 3 months. Thaw in the fridge or eat frozen (if you have strong teeth!).
- Room Temperature: Can be left out for 2-3 days, but if your house is warm, the chocolate may soften and become messy.
Conclusion
Freshly Made Peanut Butter Balls prove that you don’t need complex techniques to create a luxury treat. By mastering the simple balance of fats and sugars, and respecting the temperature requirements of chocolate, you can produce a confection that is texturally satisfying and deeply flavorful. Whether you call them Buckeyes, truffles, or just peanut butter balls, they are a testament to the timeless combination of chocolate and peanut butter.
Ready to roll? Clear some space in your freezer! If you make this recipe, we’d love to see your dipping skills—tag us in your photos. And for more no-bake magic, subscribe to our newsletter for weekly dessert hacks.
FAQs
Q: Can I use almond butter or cashew butter?
A: Yes! Any nut butter works as long as it is the “no-stir” creamy variety. Almond butter balls are a delicious, slightly more subtle alternative.
Q: Do I need to use paraffin wax?
A: Old-school recipes often call for paraffin wax to make the chocolate shiny and shelf-stable. However, coconut oil is a natural, edible alternative that achieves a similar gloss and smoothness without using wax.
Q: Why is my chocolate too thick?
A: Chocolate chips often contain stabilizers that keep them shaped, making them thick when melted. Add another teaspoon of coconut oil or vegetable shortening to thin it out to a dipping consistency.
Q: Is this gluten-free?
A: Generally, yes. Peanut butter, sugar, and chocolate are naturally gluten-free. Just check your specific brand labels to ensure they are processed in a gluten-free facility.