Follow Me On Social Media!

Gluten-Free Vegan Bread (Soft, Sliceable Loaf, 1 Hour 15 Min)
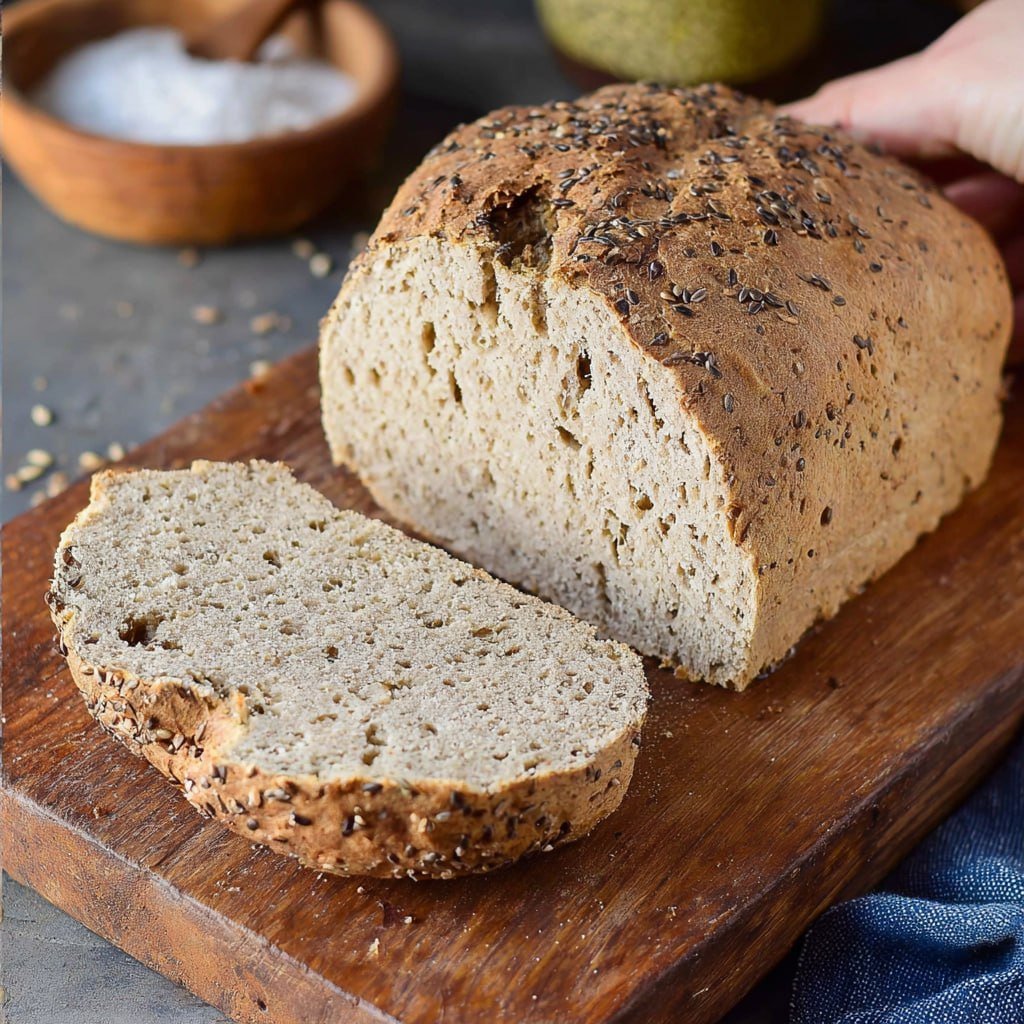
This gluten-free vegan bread is soft, sliceable, and truly tastes like real bread. Simple pantry ingredients, one loaf pan, and zero gum needed.

If you have been chasing a gluten-free vegan bread recipe that actually slices like a real sandwich loaf instead of falling apart in sad little crumbs on the counter, come sit next to me — I made this one for us.
Fun fact: psyllium husk, the little fiber powder we use here, was traditionally used in Ayurvedic medicine long before it ever landed in a mixing bowl. In gluten-free baking, it forms a gel that mimics the stretchy structure gluten normally provides, which is why this loaf holds together so beautifully.
Why this recipe works
- Psyllium husk creates a soft, flexible crumb without any xanthan or guar gum.
- The brown rice flour and tapioca starch ratio is dialed in to be tender without turning gummy.
- Apple cider vinegar plus baking soda gives an instant lift, while baking powder carries the rise through the oven for a taller loaf.
- No fancy equipment, no proofing, no kneading — just two bowls and a loaf pan.
Ingredients
- 1 cup brown rice flour
- ½ cup tapioca starch
- ¼ cup gluten-free oat flour
- 2 tablespoons psyllium husk
- 1 teaspoon baking powder
- ½ teaspoon baking soda
- 1 teaspoon salt
- 1 cup warm water
- 2 tablespoons apple cider vinegar
- 2 tablespoons olive oil
- 1 tablespoon maple syrup
Instructions
Step 1: Warm up the oven and prep the pan
Set your oven to 180°C (about 350°F) and lightly grease a standard loaf pan with a little olive oil. I like to line the bottom with a strip of parchment too, so the loaf lifts out clean once it has cooled.
Step 2: Whisk the dry ingredients
In a large mixing bowl, whisk together the brown rice flour, tapioca starch, oat flour, psyllium husk, baking powder, baking soda, and salt. Give it a proper stir — you want the psyllium evenly distributed so no gummy pockets form later.
Step 3: Combine the wet ingredients
In a separate bowl or measuring jug, stir together the warm water, apple cider vinegar, olive oil, and maple syrup. You will see it fizz a little where the vinegar meets the syrup, which is exactly what we want.
Step 4: Bring the dough together
Pour the wet mixture into the dry and stir with a sturdy spoon or spatula until a thick, slightly sticky dough forms. It will not look like wheat bread dough — it is more like a soft, moldable paste. That is normal, and the psyllium will keep tightening things up as it sits.
Step 5: Shape and bake
Scrape the dough into your prepared pan, smooth the top with a wet spatula (I love this little trick — it gives you that pretty rounded crown), and slide it into the oven. Bake for 55 to 65 minutes, until the crust is deeply golden and the loaf sounds hollow when tapped on the bottom.
Step 6: Cool completely before slicing
This is the make-or-break moment. Turn the loaf out onto a wire rack and let it cool for at least one full hour before you even think about slicing. I know, it smells incredible. But gluten-free starches need that hour to set, and this single step is the difference between clean slices and a crumbly mess.
Nutrition information
- Calories: 145 per slice (based on 12 slices)
- Carbohydrates: 26g
- Protein: 2g
- Fat: 3g
- Fiber: 3g
- Sugar: 1g
- Sodium: 210mg
Pro tips for the best gluten-free vegan bread
- Use whole psyllium husk (not powder) for the best crumb — if you only have powder, use about 1.5 tablespoons instead.
- Weigh your flours if you can. Gluten-free flours pack differently than wheat, and even a heavy hand with the rice flour can turn the loaf dense.
- Warm water matters — it activates the psyllium faster and gives you a better rise. Aim for lukewarm, never hot.
- Want a beautiful crust? Brush the top with a little olive oil before baking, or sprinkle on seeds for texture.
- Try mix-ins: 2 teaspoons dried rosemary and 1 teaspoon thyme for an herbed loaf, or 2 tablespoons nutritional yeast plus 1 teaspoon garlic powder for a savory version. For something sweeter, fold in 2 tablespoons raisins with ½ teaspoon cinnamon.
Frequently asked questions
Why do we use both baking powder and baking soda?
They work as a two-part team. The baking soda reacts immediately with the apple cider vinegar to give the batter its first burst of lift, and the baking powder kicks in during baking for a slower, sustained rise. Together they give the loaf a lighter crumb than either could alone.
Can I turn this into rolls instead of a loaf?
Absolutely. Divide the dough into 8 equal portions, shape into rounds on a lined baking sheet, and bake at 200°C (about 400°F) for 25 to 30 minutes. Same recipe, same cooling rule, just quicker to bake.
How do I store this bread?
Once fully cooled, wrap the loaf in a clean towel and keep it in an airtight container at room temperature for up to 2 days, or refrigerate for up to 5 days. For longer storage, slice it first and freeze the slices with parchment between them.
Can I use a different flour instead of brown rice flour?
Sorghum flour or a mild millet flour can stand in for brown rice flour cup-for-cup. I would avoid swapping in almond or coconut flour, though — they behave completely differently and will throw off the moisture balance.
Why is my bread gummy inside?
Nine times out of ten, it was sliced too early. Gluten-free starches need the full cooling window to set. If you have already given it that hour and it still feels wet, try baking the loaf 5 to 10 minutes longer next time, and make sure your psyllium husk is fresh.