- Time needed
- 3 hrs
- Made this
- 0 crocheters
- Skill level
- Intermediate
- Hook size
- 2.5 mm
- Finished size
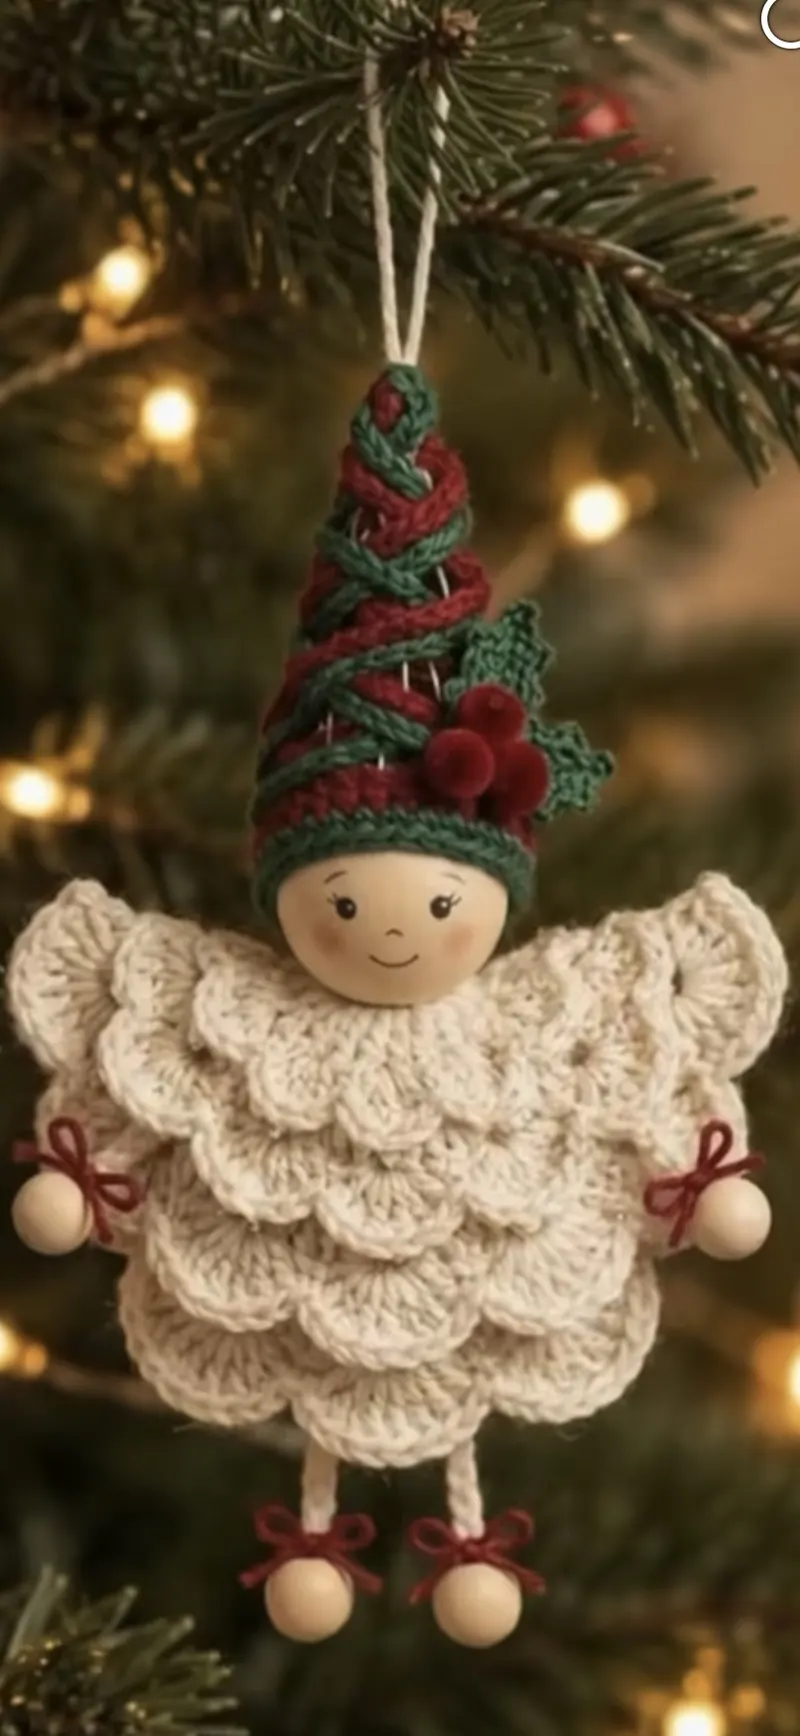
- Approx. 7.5 in (19 cm) tall without hanging loop and 3.5 in (9 cm) wide
On this page
- Skill level
Intermediate
Comfortable with shaping, joining and reading counts.
- Time
3 hrs
An average pace, including assembly.
- Use
Christmas Tree Ornament
Approx. 7.5 in (19 cm) tall without hanging loop and 3.5 in (9 cm) wide
Why you'll love it
- Layered shell tiers create a soft, ruffled dress that looks like little wings.
- Front-loop tiers mean no separate pieces to sew onto the dress.
- The wooden bead head and limbs give her a classic handmade look.
- She uses only small amounts of yarn, which makes her a great scrap project.
- She takes about three hours, so you can make a whole set for gifts.
Materials needed
Tools
- 2.5 mm (US B/C) crochet hook
- Tapestry needle
- Scissors
- Stitch marker
- One 30 mm (1.2 in) round wooden bead for the head
- Four 12 mm (1/2 in) round wooden beads for the hands and feet
- Three 10 mm red felt balls or small red pompoms for the holly berries
- 10 in (25 cm) of white cotton cord for the hanging loop
- Fine black marker or acrylic paint and a fine brush, plus pink paint or blush for the cheeks
- Optional: clear craft glue
Gauge & finished measurements
Gauge: 24 sc and 26 rounds = 4 in (10 cm) in sport-weight cotton with a 2.5 mm hook. The dress neck (Round 1) should fit snugly around the bottom of a 30 mm bead.
Row counter
Row 0
Tap the circle after each row
The pattern
Dress Base
Shell Tiers
Elf Hat
Holly and Limbs
Assembly
- 1
Face: decide which way the bead hole runs (top to bottom). Paint or draw two small eyes with lashes, a tiny nose, and a smile on the side of the bead, then add pink cheeks. Let the paint dry completely.
- 2
Hanging cord: fold the white cord in half. Push both ends through the tip of the hat from the outside in, so the folded loop stays on top.
- 3
Head: thread both cord ends down through the head bead. Place the hat on top of the bead, adding a small wisp of stuffing or a dab of glue inside the hat to hold it in place.
- 4
Dress: thread the cord ends through the neck ring of the dress. Pull the dress up so Round 1 fits snugly around the bottom of the bead.
- 5
Secure: inside the dress, tie the cord ends in a large double knot (or through a small spare bead) so the ornament hangs securely from the loop. Sew or glue the neck ring to the base of the bead.
- 6
Legs: sew the top of each leg chain to the inside of the dress at Round 16, about 1 in (2.5 cm) apart, so the bead feet hang below the hem.
- 7
Arms and bows: thread the arm cord through Round 7 and attach the hand beads. Tie the red bows above all four beads.
- 8
Holly: sew the two leaves and glue or sew the three red felt berries to the side of the hat, just above the brim.
Important notes
- Tip: This is an original pattern inspired by the photo. Hidden construction details, yarn weight, and dimensions are interpreted from the image, and the pattern has not been physically test-crocheted.
- Tip: Abbreviations (US terms): ch = chain, sc = single crochet, hdc = half double crochet, dc = double crochet, sl st = slip stitch, MR = magic ring, BLO = back loop only.
- Tip: The dress base and hat are worked in continuous rounds with a stitch marker. The tiers and hem are joined rounds; the ch 1 at the start does not count as a stitch.
- Tip: If your bead is a different size, adjust Round 1 of the dress so the neck fits snugly, keeping a multiple of 6 stitches so the increase rounds still work.
- Tip: Safety: wooden beads and small parts are choking hazards. This is a decoration, not a toy for children.
Pattern FAQ
Can I use a different bead size for the head?
Yes. For a 25 mm bead, start the dress with ch 10 and the hat with fewer increases so it ends at 20 stitches. For a 40 mm bead, use DK cotton and a 3.5 mm hook with the same stitch counts.
Why do my shell tiers look flat instead of layered?
Make sure each back-loop round was worked in the back loops only, so the tiers sit on separate rings of front loops. Working the tiers from the hem upward and lightly steaming them helps them overlap neatly.
Can I make her without painting?
Yes. Use a fine-tipped permanent marker for the eyes and smile and a little powder blush for the cheeks. You can also leave the bead plain for a minimalist Scandinavian look.
What thread works best?
Mercerized sport-weight cotton gives crisp, defined shells. Thinner crochet thread with a smaller hook makes a smaller, more delicate ornament.
How do I store the ornaments?
Wrap each one in tissue paper and store it flat in a box so the shell tiers are not crushed. If the tiers lose their shape, lightly steam them and reshape with your fingers.
Ratings & reviews
No reviews yet. Made it? Be the first to share how it went.
I made this!
Finished your Wooden Bead Elf Angel Ornament? Share a photo and it may be featured in our Made-by-You gallery.
Elf Angel Christmas Ornament Crochet Pattern, © 2026 Mandy’s Crochet Studio. Source: https://mandyshealthylife.com/patterns/wooden-bead-elf-angel-ornament-crochet-pattern/. Please do not redistribute this pattern.