Follow Me On Social Media!

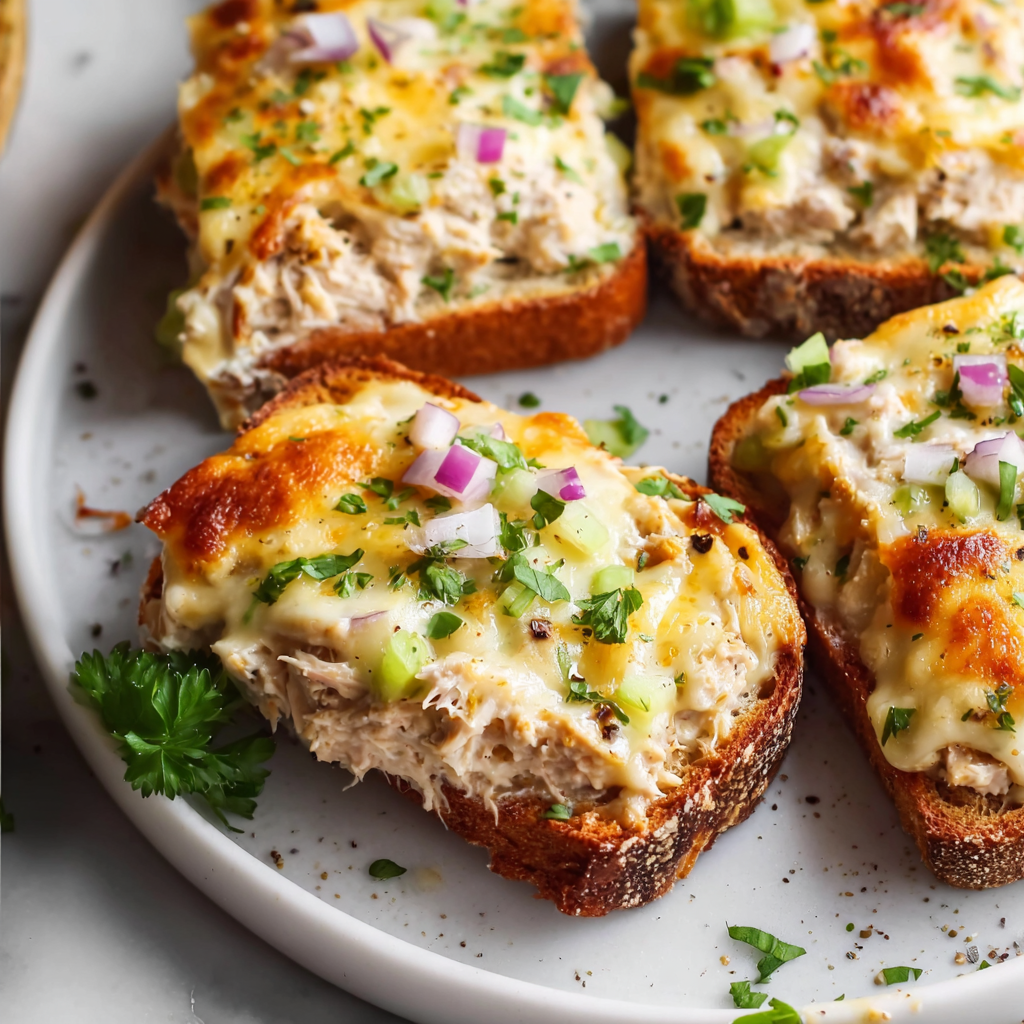
The Ultimate Skillet Tuna Melt (Diner Style)

Introduction
While the sheet pan method is great for feeding a crowd, sometimes you just want that unparalleled, buttery crunch that only a frying pan can provide. This is the Skillet Tuna Melt—essentially a tuna salad sandwich crossed with a grilled cheese.
The magic of the stovetop method lies in the “Maillard Reaction.” By maintaining direct contact between the buttered bread and the hot skillet, you create a golden-brown crust that is significantly crispier than what you get in an oven. The contrast between the shattering exterior, the cool-yet-warming tuna, and the molten cheese is what makes this a diner staple across America.
Ingredients List
The structural integrity of the bread is vital here. Soft white bread will disintegrate; you need something sturdy.
The Tuna Salad:
- 2 Cans (5 oz) Tuna: Solid White Albacore (drained very dry).
- ¼ Cup Mayonnaise.
- 1 Stalk Celery: Finely diced (for crunch).
- 1 Tablespoon Red Onion: Minced.
- 1 Teaspoon Dijon Mustard.
- 1 Teaspoon Lemon Juice.
- Salt & Black Pepper.

The Structure:
- 4 Slices Bread:
- Best Choice: Sourdough, Rye, or a thick-cut Country White. These hold up to the heat and weight of the filling.
- 4 Slices Cheese: Sharp Cheddar is classic, but Swiss or Havarti melt beautifully.
- 2 Tablespoons Butter (or Mayo): For the outside of the bread.
- The Debate: Butter adds better flavor; Mayonnaise browns faster and more evenly. Choose your fighter.
Timing
This is a quick lunch, but it requires patience with the heat level.
- Prep Time: 10 minutes.
- Cook Time: 6–8 minutes.
- Total Time: Approx. 18 minutes.
Data Insight: A common issue with tuna melts is a cold center. Tuna salad is dense. To ensure the cheese melts and the center warms through before the bread burns, you must cook at a Medium-Low heat, not High.1
Step-by-Step Instructions
Step 1: The Mix
In a medium bowl, combine the thoroughly drained tuna, mayonnaise, celery, onion, Dijon, lemon juice, salt, and pepper.
- Tip: Break up large chunks of tuna, but don’t mash it into a paste. You want texture.
Step 2: The Assemble
- Butter: Spread butter (or mayo) on one side of each slice of bread.
- Flip: Place the slices butter-side down on a cutting board.
- Layer: On two slices, place a slice of cheese. Top with a generous scoop of tuna salad. Top with the second slice of cheese (sandwiching the tuna ensures the bread sticks to the filling).
- Close: Place the remaining bread slices on top, butter-side up.
Step 3: The Grill
Heat a non-stick skillet or cast-iron pan over Medium-Low heat.
- Cook: Place the sandwiches in the pan.
- Cover (The Secret Trick): Place a lid on the pan for the first 2 minutes. This traps steam and helps the cheese melt faster without burning the bread.
- Uncover: Remove lid and continue cooking until the bottom is deep golden brown (approx 3–4 minutes total).
Step 4: The Flip
- Flip: Carefully flip the sandwich. Press down gently with a spatula to compress the ingredients.
- Cook: Cook the second side (uncovered) for another 3 minutes until golden and crispy.
Nutritional Information
A hearty, protein-packed lunch. Estimated breakdown per sandwich:
| Nutriente | Cantidad | % Valor Diario |
| Calories | 450 kcal | – |
| Protein | 28g | 56% |
| Total Fat | 22g | 33% |
| Carbohydrates | 30g | 10% |
| Calcium | High | 25% |
Healthier Alternatives for the Recipe
Customize your Pan Melt for wellness goals:
- Open-Faced:
- Only use one slice of bread per person. Butter the bottom, top with tuna and cheese, and cover the pan until the bottom is crisp and the cheese is bubbly. (Cuts carbs in half).
- Oil Instead of Butter:
- Brush the bread with Olive Oil for heart-healthy fats, though the flavor profile will change slightly.
- Greens:
- Add fresh spinach or avocado inside the sandwich after flipping to warm it slightly without wilting it completely.
Common Mistakes to Avoid
Don’t rush the toast.
- High Heat:
- The Error: Cranking the stove to High.
- The Result: Burnt black bread and cold, unmelted cheese.
- The Fix: Low and slow wins the race.
- Soggy Bread:
- The Error: Using wet tuna or thin white bread.
- The Fix: Squeeze the water out of the tuna can and use sturdy Sourdough.
- The “Slide”:
- The Error: Flipping too aggressively.
- The Result: Tuna flies everywhere.
- The Fix: Use a wide spatula and support the top slice with your fingers (carefully) while flipping.
Storing Tips for the Recipe
- Leftovers: These do not store well. The bread will get soggy in the fridge.
- Prep Ahead: You can make the tuna salad up to 3 days in advance.2 Assemble and grill the sandwich fresh when you are ready to eat.
Conclusion
The Skillet Tuna Melt is comfort food engineering at its finest. It transforms pantry staples into a meal that feels indulgent and satisfying. The crunch of the butter-fried bread against the creamy, savory filling is a texture combination that never gets old.
Summary: A classic diner-style sandwich with tuna salad and cheddar cheese, grilled in a skillet with butter until golden and crispy.
Ready to grill?
Grab that skillet! Rate this recipe 5 stars if you achieved the perfect golden crust, and leave a comment below: butter or mayo on the outside? Subscribe for more lunch classics!