- Time needed
- 150 hrs
- Made this
- 0 crocheters
- Skill level
- Intermediate
- Hook size
- 3.5 mm
- Finished size
- Queen bedspread approx. 95 x 104 in (241 x 264 cm); each square approx. 8.5 in (21.5 cm)
On this page
- Skill level
Intermediate
Comfortable with shaping, joining and reading counts.
- Time
150 hrs
An average pace, including assembly.
- Use
Heirloom Bedspread
Queen bedspread approx. 95 x 104 in (241 x 264 cm); each square approx. 8.5 in (21.5 cm)
Why you'll love it
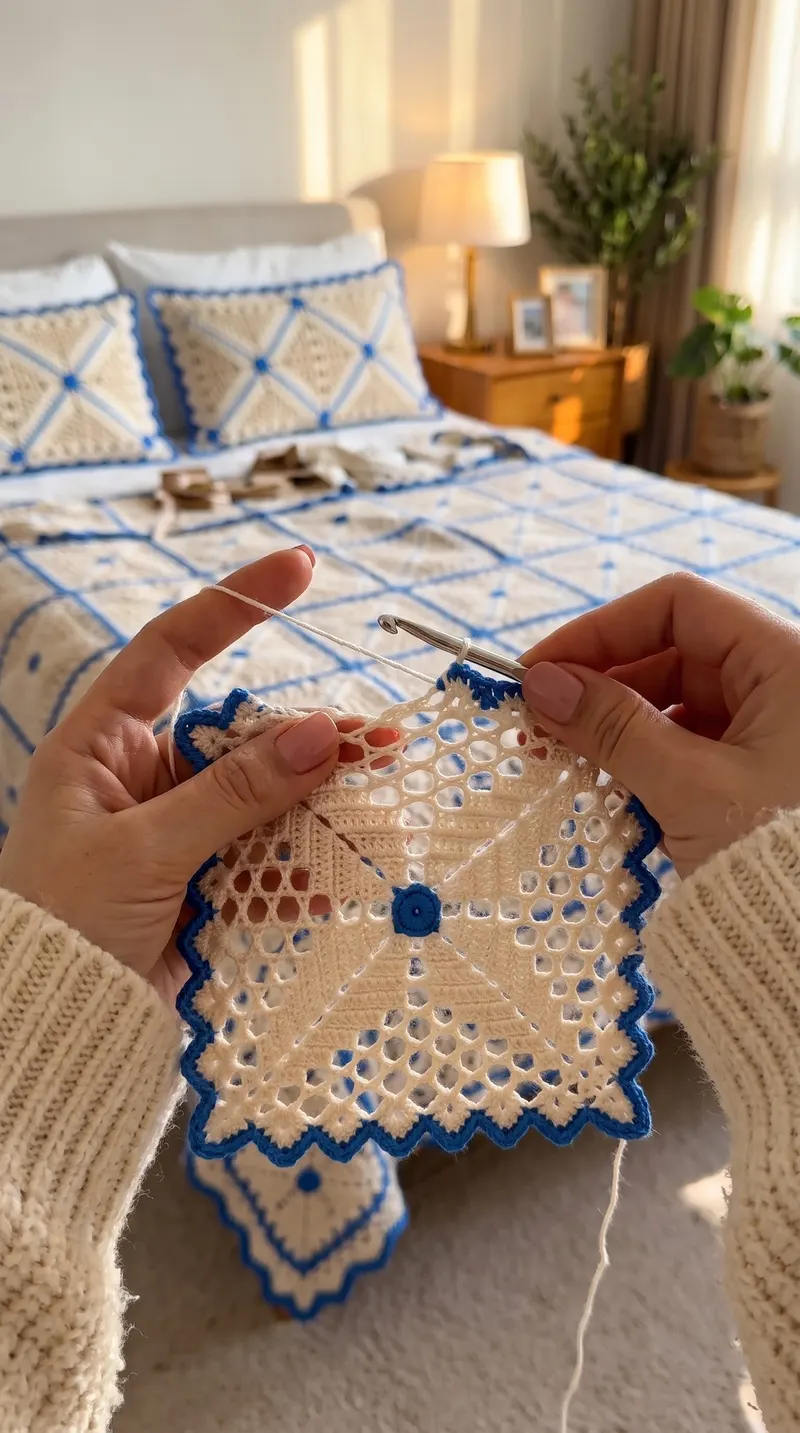
- Solid centers and open mesh rounds give each square a lovely lacy contrast.
- Stacked corner spaces create delicate diagonal lines without extra work.
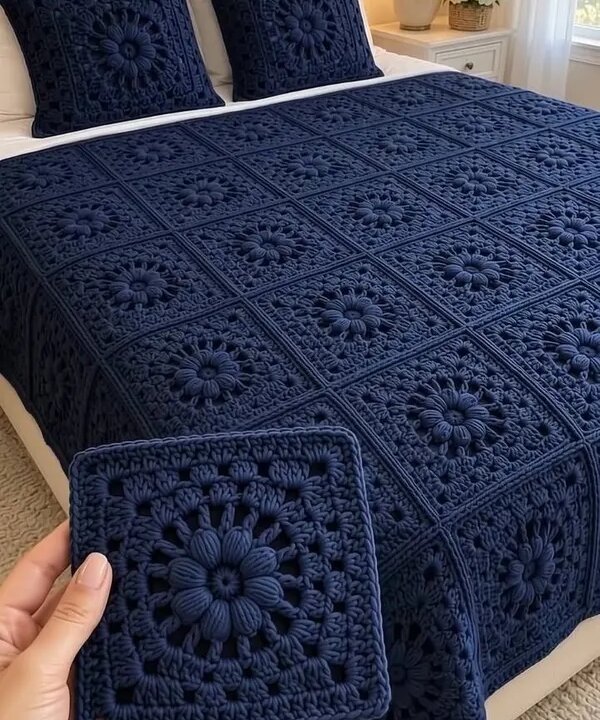
- Blue seams and dots tie the whole bedspread together.
- The sawtooth border adds a crisp, decorative finish.
- DK cotton gives clear stitch definition and a light drape.
Materials needed
Tools
- 3.5 mm (US E-4) crochet hook
- Tapestry needle
- Scissors
- Locking stitch markers
- Measuring tape
- Blocking mats and rust-proof pins
- Spray bottle or steamer for blocking
Gauge & finished measurements
Gauge: 20 dc and 10 rows = 4 in (10 cm) in DK cotton with a 3.5 mm hook. Square gauge: Rounds 1-5 measure about 4 in (10 cm) per side, and a finished square (Rounds 1-11) measures about 8.5 in (21.5 cm) per side.
Row counter
Row 0
Tap the circle after each row
The pattern
Solid Center
Mesh Rounds
Square Edge
Joining and Dots
Sawtooth Border
Assembly
- 1
Make 132 squares and block them to 8.5 x 8.5 in.
- 2
Lay out the squares in 12 rows of 11 with all corners aligned.
- 3
Work the 11 horizontal seams, then the 10 vertical seams.
- 4
Sew a blue dot over each of the 110 interior intersections.
- 5
Work Border Rounds 1 and 2 around the bedspread.
- 6
Pin the sawtooth points and give the border a light steam.
Important notes
- Tip: This is an original pattern inspired by the photo. Hidden details are interpreted from the image, and the pattern has not been physically test-crocheted.
- Tip: Abbreviations (US terms): ch = chain, sc = single crochet, hdc = half double crochet, dc = double crochet, sl st = slip stitch, MR = magic ring.
- Tip: The ch-3 at the start of dc rounds counts as a dc. The ch 1 at the start of sc rounds does not count as a stitch.
- Tip: Work all rounds with the right side facing; do not turn.
- Tip: Square stitch counts do not include the corner ch-2 spaces.
Pattern FAQ
How do I change the bedspread size?
Each square adds about 8.5 in. For the sawtooth border to fit, use 1 sc at each seam on edges with an even number of squares and 2 sc at each seam on edges with an odd number of squares.
Can I join the squares as I go?
Yes. Join each new square to its neighbors with sl st in Round 11, but you will lose the raised blue seam lines seen in the photo.
Why is my square cupping?
Cupping usually comes from tight ch-1 spaces in the mesh rounds or a missed corner increase. Check the per-side counts after each round and keep the chains relaxed.
How should I wash it?
Machine wash on a gentle cycle in cool water in a large-capacity machine, then lay flat to dry and reshape the points while damp.
Ratings & reviews
No reviews yet. Made it? Be the first to share how it went.
I made this!
Finished your Blue and Cream Lace Square Bedspread? Share a photo and it may be featured in our Made-by-You gallery.
Lace Square Bedspread Crochet Pattern, © 2026 Mandy’s Crochet Studio. Source: https://mandyshealthylife.com/patterns/blue-cream-filet-lace-square-bedspread-crochet-pattern/. Please do not redistribute this pattern.