- Time needed
- 12 hrs
- Made this
- 0 crocheters
- Skill level
- Intermediate
- Hook size
- 3.5 mm
- Finished size
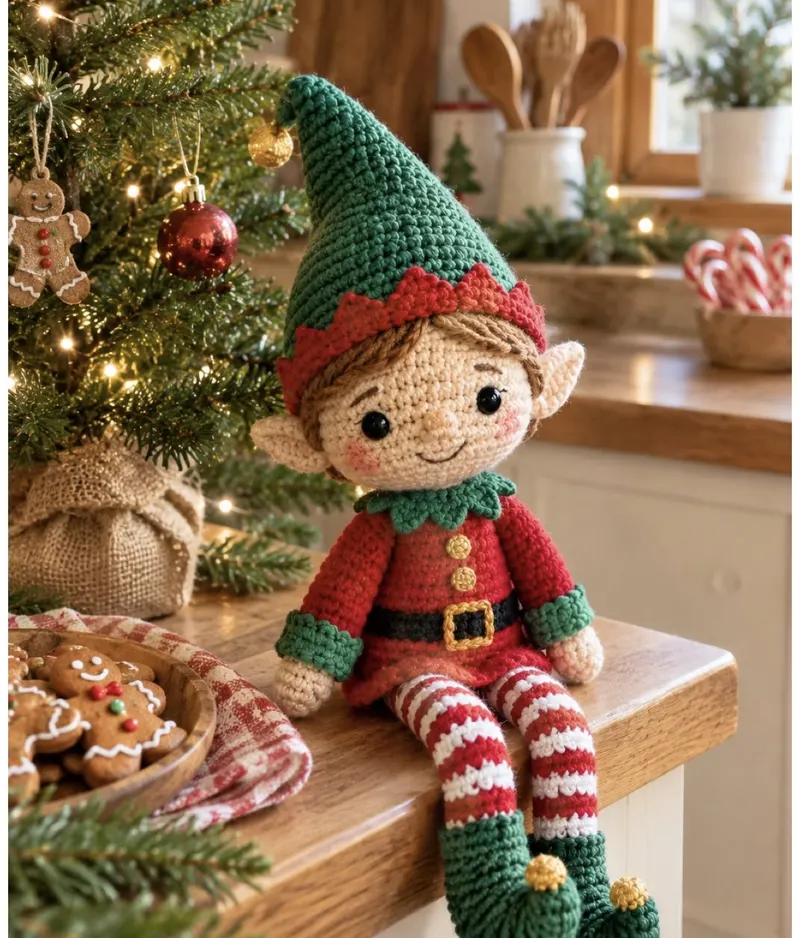
- Approx. 10.5 in (27 cm) tall sitting with hat; legs approx. 8 in (20 cm) long
On this page
- Skill level
Intermediate
Comfortable with shaping, joining and reading counts.
- Time
12 hrs
An average pace, including assembly.
- Use
Holiday Shelf Sitter
Approx. 10.5 in (27 cm) tall sitting with hat; legs approx. 8 in (20 cm) long
Why you'll love it
- His long striped legs dangle over a shelf or mantel edge for a playful pose.
- Curly-toe shoes, pointed ears, and a tall hat give him classic elf charm.
- Front-loop rounds create the peplum, collar, and cuffs without separate pieces.
- Simple color changes make the bold red and white stripes.
- He makes a fun holiday decoration or a gift for elf lovers.
Materials needed
Tools
- 3.5 mm (US E-4) crochet hook
- Tapestry needle
- Scissors
- Stitch markers
- Two 12 mm black safety eyes
- Polyester fiberfill, approx. 3 oz (85 g)
- Optional: a small sealed pouch of plastic pellets for the body base
- Optional: two pipe cleaners for posable legs
- Pins for positioning pieces
Gauge & finished measurements
Gauge: 20 sc and 22 rounds = 4 in (10 cm) in worsted yarn with a 3.5 mm hook. Head gauge: Rounds 1-9 measure about 3.4 in (8.5 cm) across when flat. Tight, even stitches matter more than exact gauge.
Row counter
Row 0
Tap the circle after each row
The pattern
Shoes and Legs (make 2)
Body and Tunic
Head
Ears, Nose and Arms
Hat and Gold Details
Assembly
- 1
Head: center the head on the neck with the face pointing forward and sew it on firmly with the neck tail.
- 2
Face: sew the nose between and just below the eyes. Sew an ear to each side of the head at eye level, angled slightly upward.
- 3
Hair: with brown yarn, embroider long straight stitches across the forehead, sweeping from the top center down to each side above the ears.
- 4
Hat: place the hat on the head so it sits low over the forehead and covers the top of the hair. Sew around the edge. Sew the zigzag brim around the bottom of the hat with Round 1 at the edge and the points facing up.
- 5
Hat tip: curl the tip of the hat to one side and tack it in place. Sew a gold bobble to the tip.
- 6
Arms: sew the flat tops of the arms to the sides of the body at Round 20, just below the collar.
- 7
Buttons: sew the two gold buttons down the center front of the tunic at about Rounds 16 and 18.
- 8
Legs: sew the flat top of each leg to the front bottom edge of the body at Rounds 7-8, side by side, so the legs hang forward and dangle when he sits on a shelf.
- 9
Shoes: sew a gold bobble to the curled tip of each shoe.
Important notes
- Tip: This is an original pattern inspired by the photo. Hidden construction details, yarn weight, and dimensions are interpreted from the image, and the pattern has not been physically test-crocheted.
- Tip: Abbreviations (US terms): ch = chain, sc = single crochet, hdc = half double crochet, dc = double crochet, tr = treble crochet, sl st = slip stitch, MR = magic ring, BLO = back loop only, dec = decrease (invisible single crochet decrease).
- Tip: Work all amigurumi pieces in continuous rounds with a stitch marker. The peplum, collar, cuffs, and brim rounds are joined; the ch 1 or ch 2 at the start does not count as a stitch.
- Tip: Stuff the head and neck firmly so the head stays upright, but keep the legs soft so they dangle.
- Tip: Safety: safety eyes, pipe cleaners, pellets, and small parts can be choking hazards. For babies and children under 3, embroider the eyes and skip the pipe cleaners and pellets.
Pattern FAQ
How do I make him sit on the edge of a shelf?
Sew the legs to the front bottom edge of the body, not underneath it. Add a small pellet pouch to the base for weight, and set him on the shelf with his legs hanging over the edge.
Can I make the stripes without carrying yarn?
Yes. You can cut the yarn at each color change and weave in the ends, but carrying the unused color loosely inside the leg is faster and leaves fewer ends.
My hat keeps falling off. What should I do?
Sew the hat to the head all the way around the edge, and add a few stitches through the brim into the head at the front and back.
Can I make a girl elf?
Yes. Add two braids of brown yarn under the hat at each side, give her longer lashes, and work 2 extra rounds on the peplum for a little skirt.
How do I clean him?
Spot clean with a damp cloth and mild soap. If needed, hand wash gently in cool water, press out the water with a towel, and let him air dry completely. Do not machine wash if you used pellets or pipe cleaners.
Ratings & reviews
No reviews yet. Made it? Be the first to share how it went.
I made this!
Finished your Shelf Sitter Christmas Elf Doll? Share a photo and it may be featured in our Made-by-You gallery.
Christmas Elf Amigurumi Crochet Pattern, © 2026 Mandy’s Crochet Studio. Source: https://mandyshealthylife.com/patterns/shelf-sitter-christmas-elf-amigurumi-crochet-pattern/. Please do not redistribute this pattern.