- Time needed
- 12 hrs
- Made this
- 0 crocheters
- Skill level
- Intermediate
- Hook size
- 3.5 mm
- Finished size
- Approx. 10.5 in (27 cm) tall sitting with hat and 8 in (20 cm) wide
On this page
- Skill level
Intermediate
Comfortable with shaping, joining and reading counts.
- Time
12 hrs
An average pace, including assembly.
- Use
Holiday Gift Bear
Approx. 10.5 in (27 cm) tall sitting with hat and 8 in (20 cm) wide
Why you'll love it
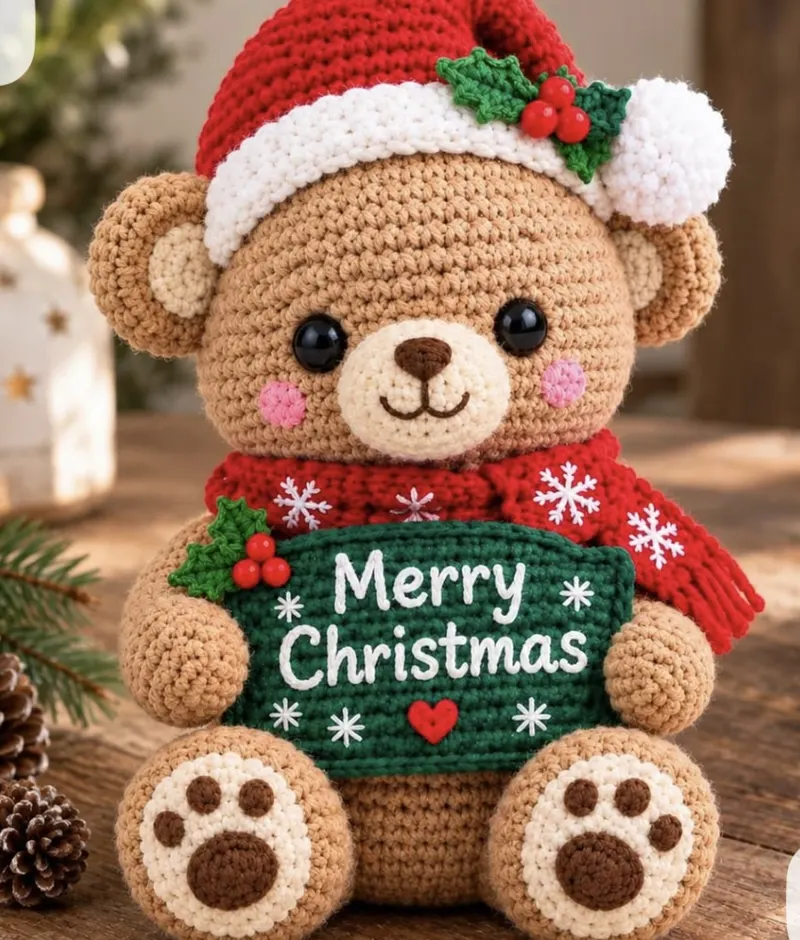
- A teddy holding a Merry Christmas sign makes an instant holiday greeting.
- Front-facing paw-pad feet add extra charm.
- The stiffened sign keeps the lettering flat and easy to read.
- You can change the sign to a name or another message.
- He sits steadily on a shelf, mantel, or table.
Materials needed
Tools
- 3.5 mm (US E-4) crochet hook
- Tapestry needle
- Scissors
- Stitch markers
- Two 15 mm black safety eyes
- Polyester fiberfill, approx. 6 oz (170 g)
- Plastic canvas cut to 5.75 x 3.4 in (14.5 x 8.5 cm)
- Water-soluble pen or tailor's chalk
Gauge & finished measurements
Gauge: 20 sc and 22 rounds = 4 in (10 cm) in worsted yarn with a 3.5 mm hook. Head gauge: Rounds 1-10 measure about 3.8 in (9.5 cm) across when flat.
Row counter
Row 0
Tap the circle after each row
The pattern
Head
Face and Ears
Body, Legs and Arms
Santa Hat and Scarf
Merry Christmas Sign and Holly
Assembly
- 1
Face: sew the muzzle centered just below the eyes, stuffing it lightly before closing. Sew the nose to the top of the muzzle, embroider the mouth, and sew a cheek below and outside each eye.
- 2
Ears: sew the ears to the top sides of the head between Rounds 7 and 11, with the cream linings facing forward.
- 3
Head: sew the head to the neck of the body with the face forward, adding stuffing to the neck as you close.
- 4
Legs: sew the legs to the front bottom of the body so they stick straight out with the soles facing forward.
- 5
Sign: sew the sign to the front of the body, just below the neck.
- 6
Arms: sew the arms to the sides of the body below the neck, with the paws resting on the left and right edges of the sign, and tack the paws to the sign.
- 7
Hat: place the hat on the head so the brim sits over the forehead and the tip falls to the right. Sew around the brim, tack the tip down, sew on the pompom, and add the holly sprig.
- 8
Scarf: wrap the scarf around the neck so one end hangs down at the front right, and tack it in place.
Important notes
- Tip: This is an original pattern inspired by the photo. Hidden details are interpreted from the image, and the pattern has not been physically test-crocheted.
- Tip: Abbreviations (US terms): ch = chain, sc = single crochet, hdc = half double crochet, dc = double crochet, sl st = slip stitch, MR = magic ring, BLO = back loop only, dec = decrease (invisible single crochet decrease).
- Tip: Work all round pieces in continuous rounds with a stitch marker. The sign and scarf are worked in turned rows; the turning ch does not count as a stitch.
- Tip: Safety: safety eyes and plastic canvas are not suitable for children under 3. For young children, embroider the eyes and leave out the plastic canvas.
Pattern FAQ
How do I embroider neat letters?
Write the text on the sign with a water-soluble pen or chalk first, keeping the letters about 0.75 in (2 cm) tall. Then follow the lines with white yarn in chain stitch or backstitch, using relaxed tension.
Can I change the message?
Yes. The sign has room for about 12-14 letters per line on two lines, so a name, Joy, Noel, or Happy Holidays all fit.
My bear's head keeps tilting. How do I fix it?
Stuff the neck and the top of the body very firmly before sewing, and sew all the way around the neck twice. Sewing the sign and arms in place also helps support the head.
How do I clean the bear?
Spot clean with a damp cloth and mild soap. Avoid machine washing because of the plastic canvas in the sign, and let the bear air dry completely.
Ratings & reviews
No reviews yet. Made it? Be the first to share how it went.
I made this!
Finished your Merry Christmas Teddy Bear? Share a photo and it may be featured in our Made-by-You gallery.
Christmas Teddy Bear Amigurumi Crochet Pattern, © 2026 Mandy’s Crochet Studio. Source: https://mandyshealthylife.com/patterns/merry-christmas-sign-teddy-bear-amigurumi-crochet-pattern/. Please do not redistribute this pattern.