- Time needed
- 8 hrs
- Made this
- 0 crocheters
- Skill level
- Intermediate
- Hook size
- 5 mm
- Finished size
- Fits an 18 in (46 cm) square pillow form; approx. 20 in (51 cm) across with scallops
On this page
- Skill level
Intermediate
Comfortable with shaping, joining and reading counts.
- Time
8 hrs
An average pace, including assembly.
- Use
Decorative Cushion
Fits an 18 in (46 cm) square pillow form; approx. 20 in (51 cm) across with scallops
Why you'll love it
- One large square makes the whole front, with no seams to sew.
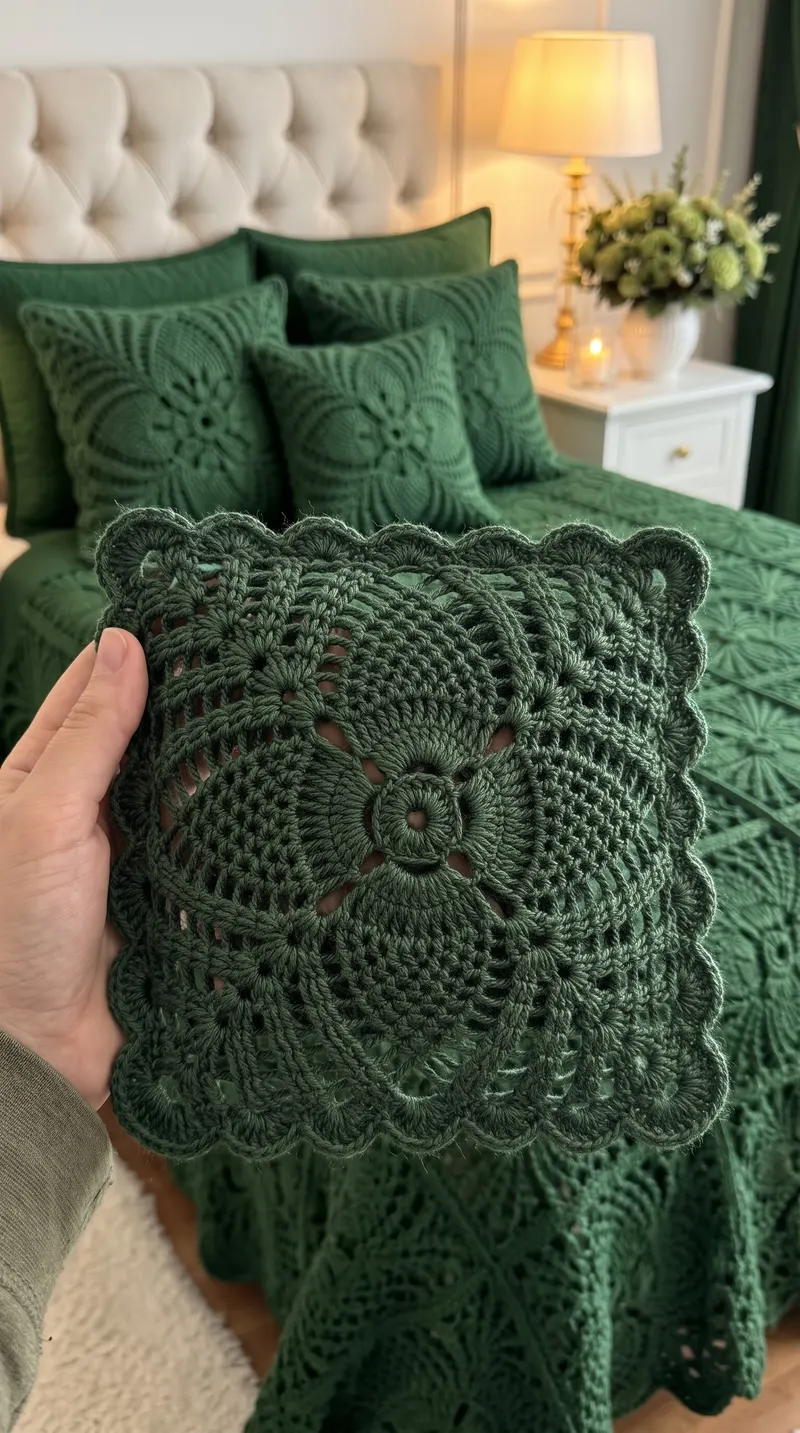
- Alternating mesh and solid bands frame the center flower beautifully.
- The envelope back means no zipper or buttons.
- A scalloped shell edge gives a soft, finished look.
- It coordinates with lacy bedspreads and throws in the same color.
Materials needed
Tools
- 5.0 mm (US H-8) crochet hook
- Tapestry needle
- Scissors
- Locking stitch markers
- One 18 in (46 cm) square pillow form
- Blocking mats and pins
Gauge & finished measurements
Gauge: 14 dc and 8 rows = 4 in (10 cm) in worsted yarn with a 5.0 mm hook. Square gauge: Rounds 1-7 measure about 7.5 in (19 cm) per side, and the finished front (Rounds 1-18) measures about 18 in (46 cm) per side.
Row counter
Row 0
Tap the circle after each row
The pattern
Front: Fan Center
Front: Mesh and Solid Bands
Envelope Back
Joining and Scalloped Edge
Assembly
- 1
Make the front (Rounds 1-18) and block it to 18 x 18 in.
- 2
Make the two back panels.
- 3
Lay the front right side down, place the back panels on top with the 4 in overlap in the middle, and pin all around.
- 4
Turn the pieces so the front faces up and work the joining round through both layers.
- 5
Work the scallop round.
- 6
Weave in all ends and insert the pillow form through the envelope opening.
Important notes
- Tip: This is an original pattern inspired by the photo. Hidden details are simplified from the image, and the pattern has not been physically test-crocheted.
- Tip: Abbreviations (US terms): ch = chain, sc = single crochet, hdc = half double crochet, dc = double crochet, sl st = slip stitch, MR = magic ring.
- Tip: The ch-3 at the start of dc rounds counts as a dc, and the ch-5 in Round 2 counts as a dc and a ch-2 space. The ch 1 and ch 2 at the start of sc and hdc rows do not count as stitches.
- Tip: Work the front rounds with the right side facing; do not turn.
- Tip: Front stitch counts do not include the corner ch-2 spaces.
Pattern FAQ
Can I make this cover for a different pillow size?
Yes. Each pair of mesh and solid rounds adds about 2 in to the width. Stop earlier for a smaller pillow or add another pair for a larger one, and make the back panels to match the finished front.
Will the pillow form show through the mesh?
A little, which is part of the lacy look. For a richer effect, put a colored fabric cover on the pillow form before inserting it.
Can I use a zipper instead of an envelope back?
Yes. Make one back panel the full size of the front (63 hdc by about 45 rows), join three sides, and sew a zipper into the fourth.
How should I wash it?
Remove the pillow form. Hand wash or machine wash the cover on a gentle cycle in cool water, then lay it flat to dry and reshape the scallops while damp.
Ratings & reviews
No reviews yet. Made it? Be the first to share how it went.
I made this!
Finished your Emerald Lace Pillow Cover? Share a photo and it may be featured in our Made-by-You gallery.
Emerald Lace Pillow Cover Crochet Pattern, © 2026 Mandy’s Crochet Studio. Source: https://mandyshealthylife.com/patterns/emerald-lace-fan-pillow-cover-crochet-pattern/. Please do not redistribute this pattern.